
mijob's TIE Phantom
- Thread starter thegreek270
- Start date
You are using an out of date browser. It may not display this or other websites correctly.
You should upgrade or use an alternative browser.
You should upgrade or use an alternative browser.
Hello again,
Thank you all.
Continuing with the cloaking device.
That was pretty straight forward, i prepared all the necessary parts of the base and glued them into place(Sorry, no pictures of that, i got carried away with the build") ).
).
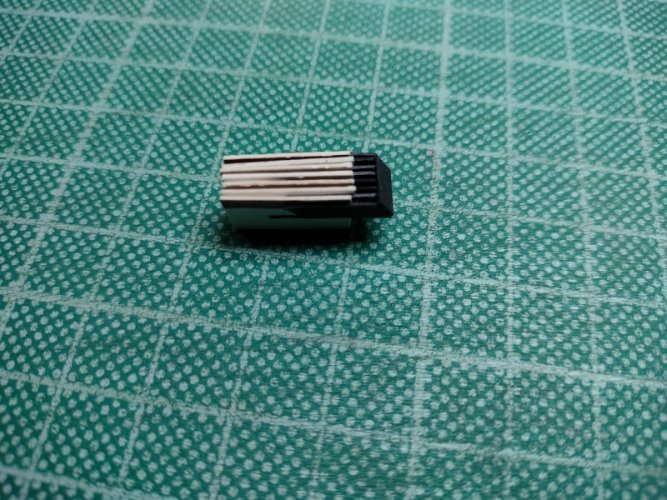
Now come this small boxes with the fins (kind of vents)
I used thicker black paper according to mijobs template to build these.


They did not come out as nice as i wanted (It seems that the paper i used for that, it's not very good for folding).
So i decided to do them again. This time with separate fins and no folding.
This is a test. I'm using cereal card in between each fin to keep the distances.

The Test was successful so let's go on to the real ones.

Done, here are the finished Boxes

And here they are inserted into their place.


Fin Structure is done.
While i was waiting for the glue to dry i build the boxes next to the cloaking device.
No pictures of that but here is one with the boxes only..

..and one of the finished boxes, ready to install.

In between i installed the Ion Engine to the main body.

and the thruster parts in preparation to install.....

the WINGS.
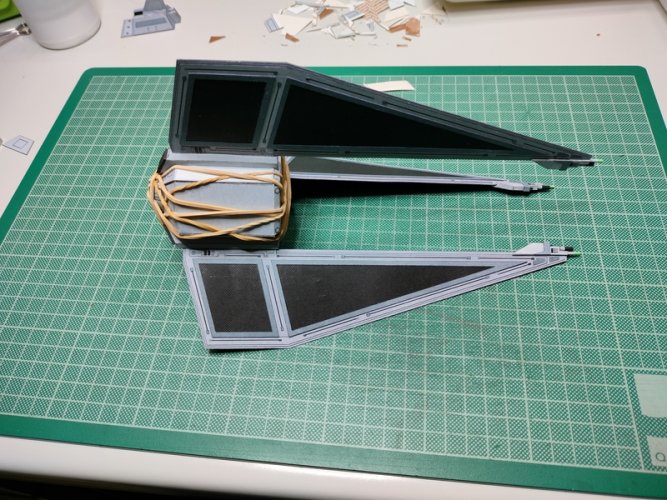
First wing attached to the Main body.


and the the other two and with some help form a lot of rubber bands to keep them in place...

Thank you all.
Continuing with the cloaking device.
That was pretty straight forward, i prepared all the necessary parts of the base and glued them into place(Sorry, no pictures of that, i got carried away with the build
).Now come this small boxes with the fins (kind of vents)
I used thicker black paper according to mijobs template to build these.
They did not come out as nice as i wanted (It seems that the paper i used for that, it's not very good for folding).
So i decided to do them again. This time with separate fins and no folding.
This is a test. I'm using cereal card in between each fin to keep the distances.
The Test was successful so let's go on to the real ones.
Done, here are the finished Boxes
And here they are inserted into their place.
Fin Structure is done.
While i was waiting for the glue to dry i build the boxes next to the cloaking device.
No pictures of that but here is one with the boxes only..
..and one of the finished boxes, ready to install.
In between i installed the Ion Engine to the main body.
and the thruster parts in preparation to install.....
the WINGS.
First wing attached to the Main body.
and the the other two and with some help form a lot of rubber bands to keep them in place...
Attachments
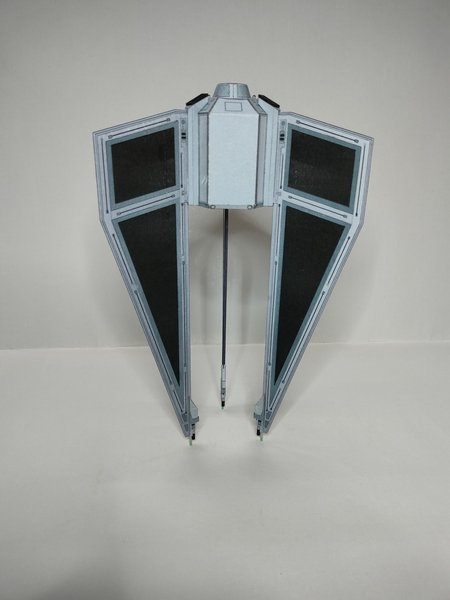
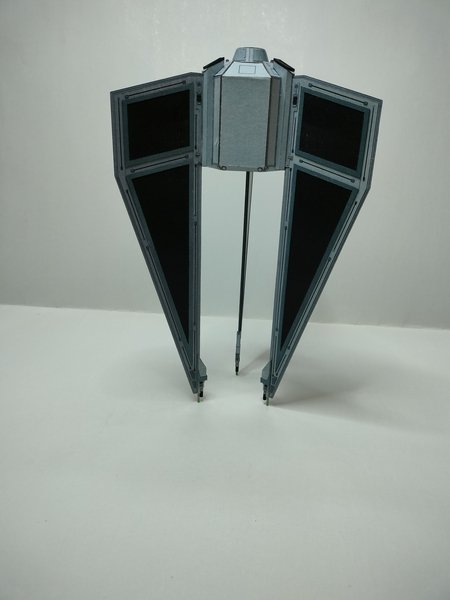


here are some shots of the result.


That's it for now,
next will be the deflector shields.
Thank you
That's it for now,
next will be the deflector shields.
Thank you
This is coming together beautifully! Everything is clear, clean, and crisp.
Nicely done!Thank you Sir, much appreciated.
Next point on the menu,, Wings.
Let's take these,
View attachment 225554
and extract these out of it.
View attachment 225555
Then let's cut a lot of the white triangle like Parts
View attachment 225556
and glue them together to create the six halves of the wings.
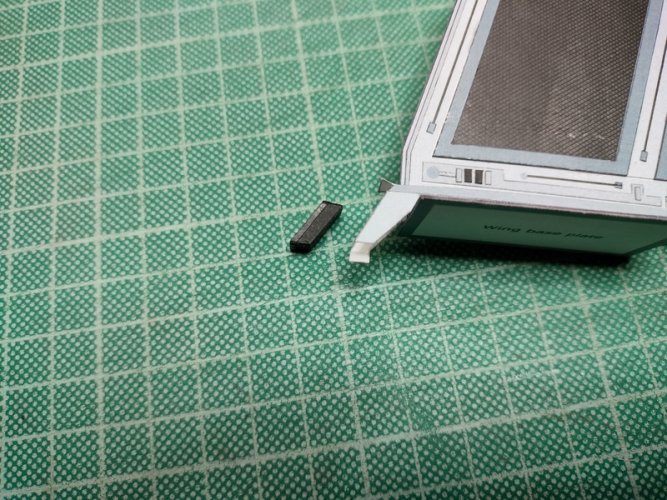
After some curing we glue these also together to create the three Wing Bases.
View attachment 225557
At this point we are already at six layers per wing.
Now we have all the parts to finish them.
View attachment 225558
After 24h under a ton of books (OK, maybe not a ton) i got this result and I'm very happy about how they turned out.
View attachment 225559
For these i did not use my normal glue (white Elmer's like glue) but the solvent based UHU Glue.
It helps with the Warping or in this case with the NOT warping
Next will be the Laser Guns.
See you soon.
Thank you
 Clean cuts and sooo straight!
Yep books would definitely work for that! The results clearly show!
Those lasers are simply A-M-A-Z-I-N-G!Hello again,
Thank you all for your kind words.
I myself was surprised how these wings turned out, i did expect some warping but not that straight wings.
Will do every layered wing structure like i did these from now on.
Layer by Layer gluing with solvent based UHU Glue and curing for 24 hours under a lot of books. Let's see if i can repeat that.
Now on to the Lasers. I did not take pictures of the process, i followed mijobs instructions and glued all twelve layers of the gun as instructed.
After that i glued the outer hulls.
View attachment 225608
View attachment 225609View attachment 225610View attachment 225611
So far nothing complicated, just a lot of work.
The difficulty on these parts was not to get glue in the slot between the two halves were it is supposed to be glued later onto the wing.
I also had to be very careful to align everything nicely
What i changed were the tips. Here i chose another approach. I tried the thin rolls with paper, didn't work for me so i used Toothpicks
View attachment 225612
View attachment 225613
Playing around with watercolors to get the right tone. That's O.K. for me.
View attachment 225614
Cut to length
View attachment 225615
Removing a little piece from the wing to house the Laser tip.
View attachment 225616
Sliding over the Gun.
View attachment 225617
And that's it.
View attachment 225618
Here are all three wings.
View attachment 225620
The other three tips i wrapped around toothpicks, that was easier for me.
View attachment 225619
And after gluing them on too here is the result for all three wings with laser guns.
View attachment 225621
And the other side
View attachment 225622
That's it for now, next will be the Cloaking devices.
Thank you

Hello again,
thank you Rhaven Blaack, mijob, Revell-Fan and Sky Seeker for your nice comments.
As noted before, here come the deflector shields
I followed basically mijobs instructions.
First i scored and cut out all needed parts.

For the black fins i used the same black paper as before at the vent boxes for the cloaking device.

Using the same technique as with the vent boxes (cereal box peaces keeping the distance between parts) i glued the fins to the bases.


Some greeble parts in between done

Deflector boxes ready

Closer look

Inserting the base with the fins

careful now ...

almost there

and here all three of them with inserted fins.

No the little wings
Here are the six halves for the wings

and here are the finished wings ready to install on the deflector boxes

and they are on

the second hull is also on the boxes and the back wall is closed

some greebles are still missing.

I used small wood peaces to keep the shape

the other side

Ready for installation

thank you Rhaven Blaack, mijob, Revell-Fan and Sky Seeker for your nice comments.
As noted before, here come the deflector shields
I followed basically mijobs instructions.
First i scored and cut out all needed parts.
For the black fins i used the same black paper as before at the vent boxes for the cloaking device.
Using the same technique as with the vent boxes (cereal box peaces keeping the distance between parts) i glued the fins to the bases.
Some greeble parts in between done
Deflector boxes ready
Closer look
Inserting the base with the fins
careful now ...
almost there
and here all three of them with inserted fins.
No the little wings
Here are the six halves for the wings
and here are the finished wings ready to install on the deflector boxes
and they are on
the second hull is also on the boxes and the back wall is closed
some greebles are still missing.
I used small wood peaces to keep the shape
the other side
Ready for installation
And the deflector boxes are done

onto the ship with theme now


That's it for now.
I hope you like it.
Will soon continue with the Cockpit.
Thank you
onto the ship with theme now
That's it for now.
I hope you like it.
Will soon continue with the Cockpit.
Thank you
Hello again,
Thank you Rhaven Blaack and mijob. Much appreciated.
Before i start the cockpit i can do the connecting plate. It's a simple cylinder, nothing complicated.
I still wanted it a little stronger so i built a structure underneath it.
I used my favorite material Cereal Box Card Board


Inner Structure is done.

The actual ring

and all the little peaces for it

and everything is glued into position. The plate is done.


Join me later with the cockpit.
Thank you
Thank you Rhaven Blaack and mijob. Much appreciated.
Before i start the cockpit i can do the connecting plate. It's a simple cylinder, nothing complicated.
I still wanted it a little stronger so i built a structure underneath it.
I used my favorite material
Cereal Box Card Board Inner Structure is done.
The actual ring
and all the little peaces for it
and everything is glued into position. The plate is done.
Join me later with the cockpit.
Thank you
In-built provisions for the pilot. ")

Thank you Revell-Fan,
@mijob Thanks, it's a simple structure, but now i can push and press as much as i want without being afraid to damage anything.
Thank you Micah
Well, here comes the cockpit.
As always, first print out, score then cut out including spares for Greebles and depth.

Here is the doubled back wall and the ground plate

preparation of the consoles

The parts are prepared

Putting them together. Consoles

and the seats

and all of it onto the base plate
Front view

Side view

and other the side

That's it for now. I have to prepare the outer walls of the cockpit.
I see you very soon.
Thank you
@mijob Thanks, it's a simple structure, but now i can push and press as much as i want without being afraid to damage anything.
Thank you Micah
Well, here comes the cockpit.
As always, first print out, score then cut out including spares for Greebles and depth.
Here is the doubled back wall and the ground plate
preparation of the consoles
The parts are prepared
Putting them together. Consoles
and the seats
and all of it onto the base plate
Front view
Side view
and other the side
That's it for now. I have to prepare the outer walls of the cockpit.
I see you very soon.
Thank you
Love that cockpit!!Thank you Revell-Fan,
@mijob Thanks, it's a simple structure, but now i can push and press as much as i want without being afraid to damage anything.
Thank you Micah
Well, here comes the cockpit.
As always, first print out, score then cut out including spares for Greebles and depth.
View attachment 225872
Here is the doubled back wall and the ground plate
View attachment 225873
preparation of the consoles
View attachment 225874
The parts are prepared
View attachment 225875
Putting them together. Consoles
View attachment 225876
and the seats
View attachment 225877
and all of it onto the base plate
Front view
View attachment 225878
Side view
View attachment 225879
and other the side
View attachment 225880
That's it for now. I have to prepare the outer walls of the cockpit.
I see you very soon.
Thank you
Hello all,
i already posted the build of the Cockpit Hull but it got lost during the transition from zealot to zealotmodels .
.
well.. lets go again
mijob's template provides 4 pieces (2 for inside, 2 for outside) to put together to form the cockpit hull. There is no problem with these templates but i was not comfortable with the idea to cut out the window pieces right besides the strip where i have to glue the other part. (too thin for me, too much can go wrong),
so i connected and shifted the parts a little.

Here is the closed Cockpit hull with inserted "windows". Sorry, I don't have any pictures of the stages in between. I had enough to do with keeping these parts correctly aligned during the gluing. And still i had to trim a little the window sections but that's on the inside and not visible.


Greebles ready to attache

Cockpit hull is ready. Here you can see the little cuts i did to get everything aligned.

Next was to insert the cockpit and glue it into place


Time to connect it with the back plate

Some weight

and the cockpit is ready

Let's build the front of the cockpit.
Thank you
i already posted the build of the Cockpit Hull but it got lost during the transition from zealot to zealotmodels
.well.. lets go again
mijob's template provides 4 pieces (2 for inside, 2 for outside) to put together to form the cockpit hull. There is no problem with these templates but i was not comfortable with the idea to cut out the window pieces right besides the strip where i have to glue the other part. (too thin for me, too much can go wrong),
so i connected and shifted the parts a little.
Here is the closed Cockpit hull with inserted "windows". Sorry, I don't have any pictures of the stages in between. I had enough to do with keeping these parts correctly aligned during the gluing. And still i had to trim a little the window sections but that's on the inside and not visible.
Greebles ready to attache
Cockpit hull is ready. Here you can see the little cuts i did to get everything aligned.
Next was to insert the cockpit and glue it into place
Time to connect it with the back plate
Some weight
and the cockpit is ready
Let's build the front of the cockpit.
Thank you