
1:16 Space Shuttle flight deck
- Thread starter Tonino
- Start date
You are using an out of date browser. It may not display this or other websites correctly.
You should upgrade or use an alternative browser.
You should upgrade or use an alternative browser.

Thanks my friends, it's always a pleasure to hear from you! ")
@Revell-Fan I'm very happy you say this because it's exactly the kind of effect I was searching.
It's very difficult to render the real appearance in photos... looking at the screens with bare eyes the likelihood is great (I assure you) but the images doesn't look so good to me.
@Revell-Fan I'm very happy you say this because it's exactly the kind of effect I was searching.
It's very difficult to render the real appearance in photos... looking at the screens with bare eyes the likelihood is great (I assure you) but the images doesn't look so good to me.
I know what you mean. I can imagine what it looks in person. It surely looks gorgeous! thumbsup
Bloody photos can never show it right
Absolutly, believe me that I saw it in my hands
")
Best, Nando
My doors will always be opened for all cardmodelers in the world
I was away for a while, excuse me my friends. Summer time means to me less time for modeling and no time for posting.
I spent a lot of time outdoors and the wheater here was so sunny this year that we had no rainy day forcing to stay at home.
But I wasn't completely out of service... here is a little update on the shuttle project.
First of all, the knobs. I felt like the dashboard was a little too flat so I decided to add the two knobs to every screen.

Perhaps they are just a little too big, but this is the littlest diameter I was able to handle. Anyway I like the final appearance once they was mounted.


OK some of them look up and others look down... but perfection is not of this world...
Then I placed the HUD boxes in place

Then I realized an element to close the lower part of the dashboard. All kept in place by the usual microtabs I always like very much.


Then I started to deal with dashboard upper wall, this part will help giving the correct shape to the front cabin wall.

The pieces at the bottom will form the lower side of this part, facing down in front of the dashboard panel.

Again I made large use of my microtabs


The three sections ready to be joined. The greebling on front panels is still to be done.
I spent a lot of time outdoors and the wheater here was so sunny this year that we had no rainy day forcing to stay at home.
But I wasn't completely out of service... here is a little update on the shuttle project.
First of all, the knobs. I felt like the dashboard was a little too flat so I decided to add the two knobs to every screen.
Perhaps they are just a little too big, but this is the littlest diameter I was able to handle. Anyway I like the final appearance once they was mounted.
OK some of them look up and others look down... but perfection is not of this world...
Then I placed the HUD boxes in place
Then I realized an element to close the lower part of the dashboard. All kept in place by the usual microtabs I always like very much.
Then I started to deal with dashboard upper wall, this part will help giving the correct shape to the front cabin wall.
The pieces at the bottom will form the lower side of this part, facing down in front of the dashboard panel.
Again I made large use of my microtabs
The three sections ready to be joined. The greebling on front panels is still to be done.
Last edited:
Next I wanted to start adding the two middle walls but I realized that the tabs, once placed, will be unreachable so it won't be possible to keep them in place, pressed to the external walls. So I had an idea that can be useful in other similar situations.
I realized many little 90° tabs to keep the big tabs in the right position once they are closed inside.

These are the 90° tabs
and this is their application

Now the big tabs are forced to stay at 90° so I can glue them without need to keep them pressed.


Here we have a BIG problem!!!

Evidently I made a mistake taking measures and now the side wall elements are too short and don't reach the middle wall. I already corrected the files (so don't worry: the model you'll build won't have this bad fitting) but it's too late for my model, unfortunately I didn't notice this bug till now. I don't want to destroy the wall and build it back again. I'll study something later to cover that gap.
If you remember I had another bad fitting issue with middle walls in my first test build. At least those issues are now resolved:


Much better than the first try... isn't it?
And... finally, I placed the central consolle to the floor.

Now to the front walls and the windows...
See you soon!
I realized many little 90° tabs to keep the big tabs in the right position once they are closed inside.
These are the 90° tabs
and this is their application
Now the big tabs are forced to stay at 90° so I can glue them without need to keep them pressed.
Here we have a BIG problem!!!
Evidently I made a mistake taking measures and now the side wall elements are too short and don't reach the middle wall. I already corrected the files (so don't worry: the model you'll build won't have this bad fitting) but it's too late for my model, unfortunately I didn't notice this bug till now. I don't want to destroy the wall and build it back again. I'll study something later to cover that gap.
If you remember I had another bad fitting issue with middle walls in my first test build. At least those issues are now resolved:
Much better than the first try... isn't it?
And... finally, I placed the central consolle to the floor.
Now to the front walls and the windows...
See you soon!
Last edited:
Oh sweet. Why this cockpit does not generate the same buzz as milenium falcon cockpit? Can somebody explain to me.
90° tabs holders are great idea:King:.
. 90° tabs holders are great idea:King:.


@uhu02 : Please take a look at this! His skill and dedication is Japanese!
@Tonino , show this to NASA and they will hire you as head of technical studies!
Cover the gap by printing out the correct portion of the area and glue it over the short piece. Remove the grey squares you glued to the surface first. Easy fix!
@Tonino , show this to NASA and they will hire you as head of technical studies!
Cover the gap by printing out the correct portion of the area and glue it over the short piece. Remove the grey squares you glued to the surface first. Easy fix!
well... RF, this is the best compliment I had received so far!Cover the gap by printing out the correct portion of the area and glue it over the short piece. Remove the grey squares you glued to the surface first. Easy fix!
Nice idea. I was going to put in just a stripe with the right color to hide the gap but your solution is much more elegant. Adopted!
This is when obsessive compulsive compulsion is a good thing!!!
Right Z!
I think every modeller, more or less, has this disease in some form. The art is raising it to highest levels :wacky:!- Apr 5, 2013
- 14,415
- 11,044
Good to see you back!
Beautiful work on those knobs!
Ì just found some interesting "historical reference" for your "mockup"
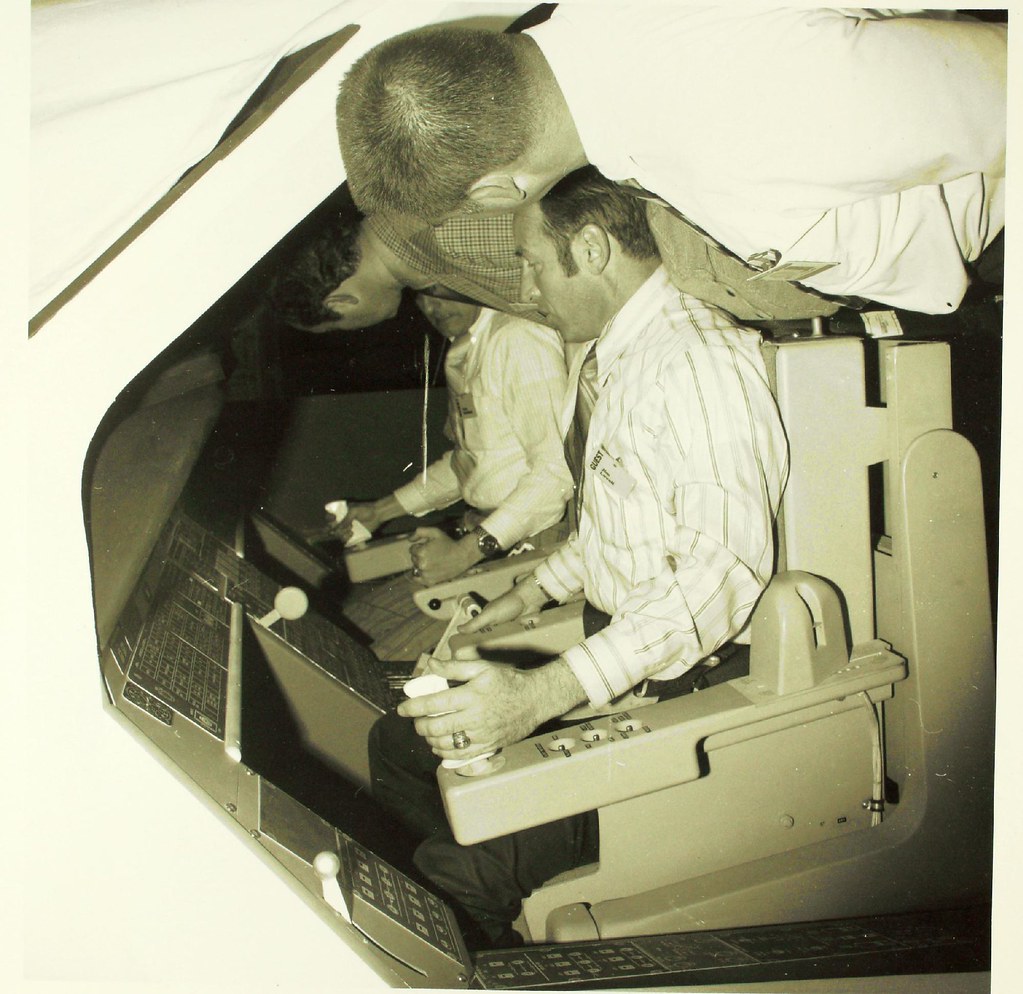 Space Shuttle Program by SDASM Archives, on Flickr
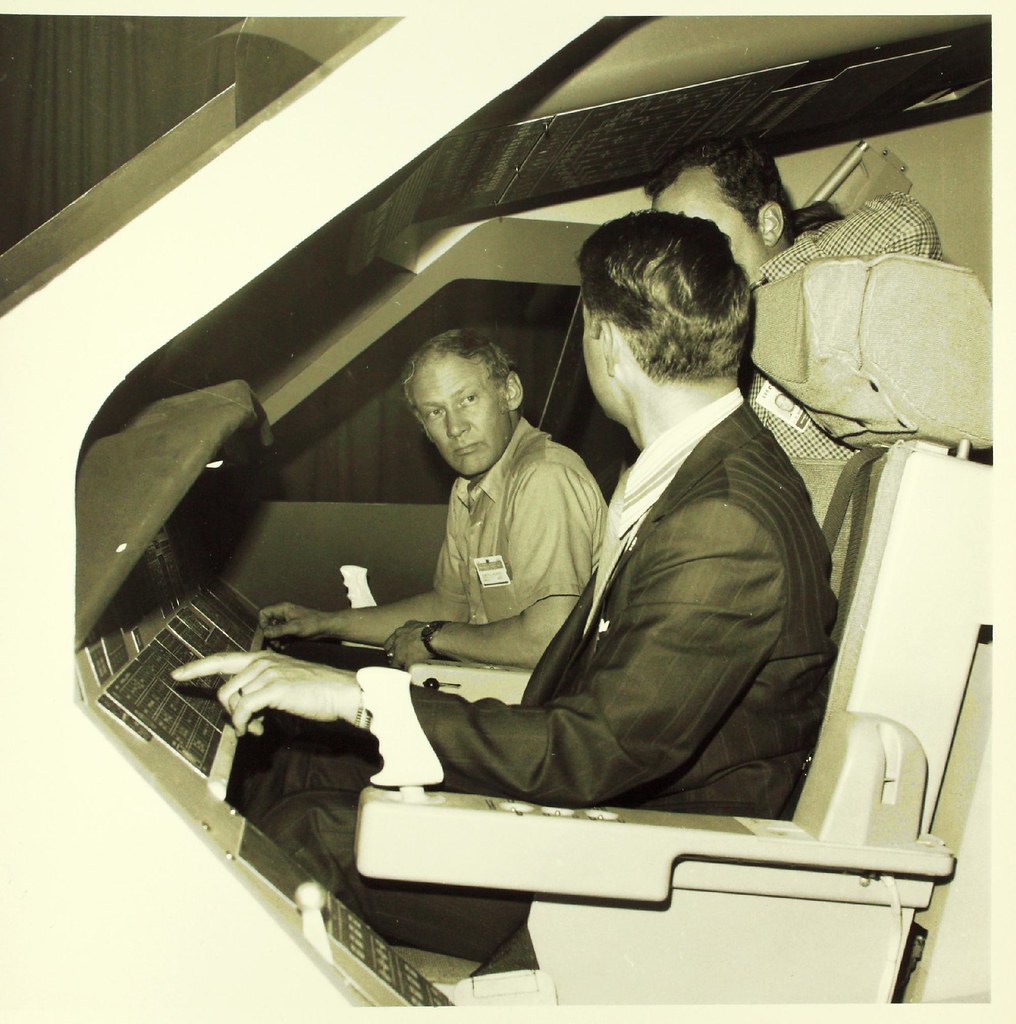 Space Shuttle Program by SDASM Archives, on Flickr
Best, Nando
Beautiful work on those knobs!
Ì just found some interesting "historical reference" for your "mockup"
Space Shuttle Program by SDASM Archives, on FlickrSpace Shuttle Program by SDASM Archives, on FlickrBest, Nando
After my return to "post summer" configuration (sigh!  ) I'm back to work (the real one...) and to modeling time too
My first action is to follow @Revell-Fan advice to fix that bad gap in my left side wall...

I hate when I have to destroy something of what I've done... scratched away all velcro patches

...and this one it's done!
Now let's go on with the windows...

Windows frames looked somewhat flat... so I tried to add some more complexity to the volumes cutting a new series of frames

Now I like them much more.

The front wall is starting to have a definite shape...

And from "outside" too you can start to recognize the "face" of the baby...
) I'm back to work (the real one...) and to modeling time too My first action is to follow @Revell-Fan advice to fix that bad gap in my left side wall...
I hate when I have to destroy something of what I've done... scratched away all velcro patches
...and this one it's done!
Now let's go on with the windows...
Windows frames looked somewhat flat... so I tried to add some more complexity to the volumes cutting a new series of frames
Now I like them much more.
The front wall is starting to have a definite shape...
And from "outside" too you can start to recognize the "face" of the baby...
Last edited: