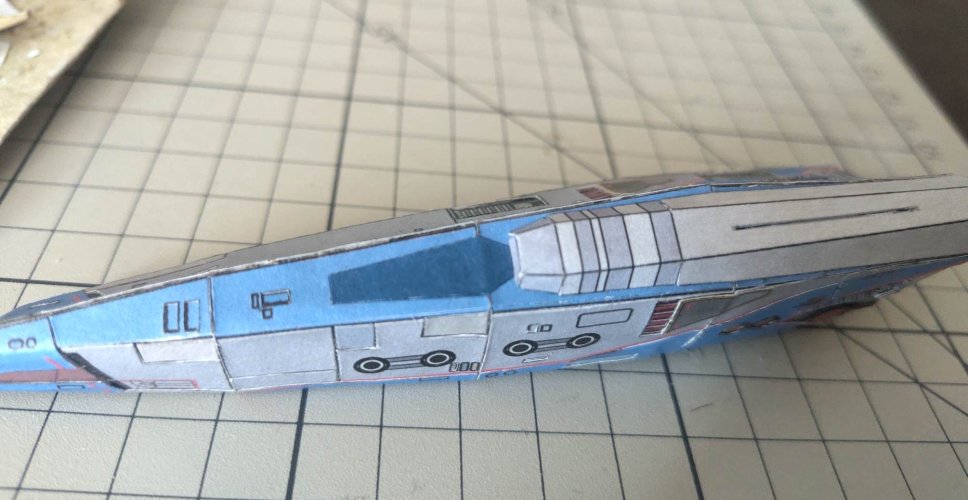
second layer with outer hull texture and engines
Prepare parts 8 - 12 by cutting out any texture that is already present on your assembled hull or choose what details you want to have as recessed details with the help of the layering technique.
For example the cockpit windows, the dark areas right behind the cockpit and the light blue areas on the top on part 11.
The landing gear bay doors on part 8 if you are going to use the landing gear later on.
For the red grill on part 8 and 11 just cut out only the dark red!
I like to use clear plastics for windows and I like to add just another layer of panels. That's completely optional and don't do that if you have a real life.
Let me show you how I did it.
cut out a little bit more of the windows to gain more area to glue the plastics to the hull.
wrap around part 8 - 12 and put the plastics in the cut out hole (apply glue only on the sides which will get covered up by the paneling layer later on to not stain the visible window area!)
cut out separated panels from an extra print and glue them on top.
Next the side things, part 13 & 14. I turned them into atmosphere engines (no such function in the game).
Cut out the parts.
glue the orange piece on the backside at the end, glue the frame of the engine exhaust to the exhaust.
There is a grey line to mark the slit to insert the glue tab of the wing later. Cut it in.
Fold and assemble both.
Glue them to the sides of the hull, between the dark blue mark and the end of the hull
Cut out the parts for 15 - 18, the four rocket engines. Prepare the pieces, shape them and assemble the nozzles.
There are four black filled circles on the rear of the hull, marking the spots for the nozzles. I suggest to glue them on with regular glue, align them and then lock them in place with super glue.
G3 for the tubing from the hull to the lower nozzles. Four for each nozzle, two from the buttom, two from the top.
Roll them up carefully.
Don't worry if you can't close them and the white backside is showing. You can hide that later.
No image texture for these tubes. They shall start from the small black markings and end on the nozzle rim at the orange ring.



)!
 why frightened?