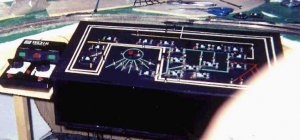
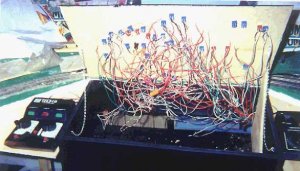
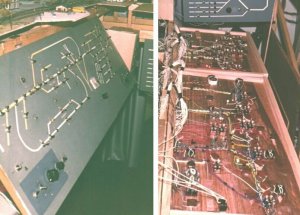
Hi Greg,
Following Shamus's method I posted a pic of my panel under "N scale models" in my thread "The Layout I built from "the Box".
Using a graphics program, draw a schematic of the tracks on standard size paper, print it out and sandwich the drg between two sheets of 1/16th thick plexiglass (we call it perspex over here in UK). All you need do is drill through for the switches etc.
Don't ask me about a box for the panel (I'm useless at carpentry )
Because I might move my layout around my control panel is separate from the layout. Connection is made by means of 21 pin SCART plugs/sockets normally intended for connecting VCR's to TV's.
My pictures are not anything like Shamus's. but here they are anyway
The back is made of 1x6 pine. The sides, front and bottom and 1/4 " ply wood. The top is 1/8 " hardboard. I use Radioshack dpdt and spst switches to control blocks and Atlas switch controlers.
Here are the two main control panels of my long gone N scale layout. It was made of plywood, and I mounted it with long piano hinges, so that I could open it easily for wiring. The blue.grey rectangles are the two throttles.
In the background of the pic at right there's another smaller panel for the staging yard. I had a separate throttle for that yard (black knob in the center).
Essentially there is only one wire to every block on the layout. (For return power I used one common bus wire.) The power from the two cabs is assigned through a double pole, double throw switch per block. If you go slowly, wiring one thread after the other, it's not complicated at all. But of course, all this sums finally up to quite a bunch of wires. And at the first moment this really looks frightening !
BTW: You see that I used multicolored wires. I got them dirt cheap from a telephone company - a very thick multistrand cable (about 20 ft, 48 threads in the cable) was more than enough to wire the whole layout!
I only bought some soft, flexible wire for the connection across the hinges of the boards. (These are the white bundles.) The rest is stiff and doesn't need to move after it is installed. All wires are soldered to simple terminal strips. They are barely visible along the left edge of the picture at right.