La Mille Maglia Porsche Hardcore motorcycle design 1/6 scale

Toutenkarton

Active Member
Oct 7, 2019
224
320
40
58
France Alsace
Hi all,

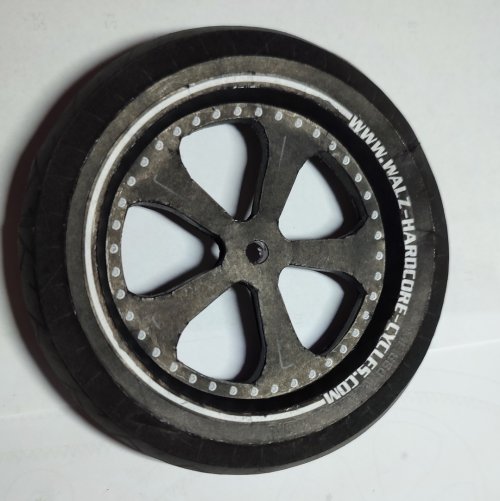
I haven't built anything for a while due to minor health and motivational issues.But here's my new build, which isn't sci-fi for once: the "Mille Maglia," a motorcycle designed by Marcus Walz for the original and by Louis "Loudog" Lopez for the paper model.

Here is the photo of the motorcycle (the real one)
hardco11.jpg

and what it should look like when finished

the_mi10.jpg

The assembly instructions are spread over 65 pages and the construction pages over 24 printed in 200g/m2.
1710497948962.jpg
A look at the sheets

And now the assembly begins, the gearbox


1710498019662.jpg

1710498019649.jpg

Different parts that will make up the engine
1710498019362.jpg

1710498019635.jpg

1710498154588.jpg

1710498154600.jpg

1710498251543.jpg

1710498251553.jpg
 
That looks like it is going to be a very intersting projest. You are off to a great start. Everything looks clean, clear and crisp.
I am looking forward to seeing how this project turns out.
 
  • Like
Reactions: micahrogers
Damn! Great start! :)

Looking at the cycle I see where Tron got its inspiration.
 
Thank you for your comments.
The rest of the parts for the engine, the air filter
1710498154612.jpg

1710498154626.jpg
Building the filter, in pink, was a challenge, I almost tore my hair out trying to get it to fit into its housing
At the end, I used a linen thread and wrapped it a few times, tightening it little by little.
I continue with the 2 exhausts1710498251263.jpg

1710498275842.jpg

The first part of the cylinders1710498275832.jpg

The start of the installation of the fins
1710498275818.jpg
These pieces take a long time to shape. The fins are each made of two parts, glued together and then individually placed in place, making about 100 pieces.
It's a piece of cake... See you tomorrow for the rest.
 
Very cool design of a motorcycle. Great work on the model so far.
 
Thank you for your comments.
The rest of the parts for the engine, the air filter
View attachment 225262

View attachment 225263
Building the filter, in pink, was a challenge, I almost tore my hair out trying to get it to fit into its housing
At the end, I used a linen thread and wrapped it a few times, tightening it little by little.
I continue with the 2 exhaustsView attachment 225264

View attachment 225265

The first part of the cylindersView attachment 225266

The start of the installation of the fins
View attachment 225267
These pieces take a long time to shape. The fins are each made of two parts, glued together and then individually placed in place, making about 100 pieces.
It's a piece of cake... See you tomorrow for the rest.
WOW!!:):):surprise::surprise::surprise: Love the detail.:)
 
Excellent! You aren't messin' around. Every part so far looks fantastic! :)
 
  • Like
Reactions: micahrogers
Thanks a lot
Mijob I guarantee you it's really paper.
Let's move on to the next part, here is the crankcase cover

1710498251567.jpg

Dry-fit the various parts to see what they look like, then glue them together, except for the exhaust, which is glued during final assembly.
Some photos of the parts are missing, I didn't think to take them during construction, but you can see them on the engine assembly.

1710498349370.jpg
1710498349389.jpg

The saddle and the engine cover

1710498349328.jpg

The 2 parts of the tank and the optics

1710498349350.jpg

The front part of the frame

1710498395562.jpg

The bottom of the frame

1710498395551.jpg

The seat post, rear wheel mudguard and frame support

1710498395541.jpg

1710498395532.jpg

The beginning of the frame assembly

1710498475145.jpg

1710498475133.jpg

And the frame finished

1710498475121.jpg

1710498474870.jpg

See you tomorrow for the rest
 
Thanks a lot
Mijob I guarantee you it's really paper.
Let's move on to the next part, here is the crankcase cover

View attachment 225273

Dry-fit the various parts to see what they look like, then glue them together, except for the exhaust, which is glued during final assembly.
Some photos of the parts are missing, I didn't think to take them during construction, but you can see them on the engine assembly.

View attachment 225274
View attachment 225275

The saddle and the engine cover

View attachment 225276

The 2 parts of the tank and the optics

View attachment 225277

The front part of the frame

View attachment 225278

The bottom of the frame

View attachment 225279

The seat post, rear wheel mudguard and frame support

View attachment 225280

View attachment 225281

The beginning of the frame assembly

View attachment 225282

View attachment 225283

And the frame finished

View attachment 225284

View attachment 225285

See you tomorrow for the rest
Awesome work! Really like the engine and the seat. Those compound curves can sure be tough. Again it's looking pretty good!:)

Sky Seeker
 
Excellent!! You did a great job on the engine cooling fins. That's one of the most important jobs. I've seen this bike with crooked fins, and it really ruins the model. You've got them just right! :)
 
Thank you all for your kind words

Another day of construction on the front of the bike and we start with the tire

1710498530359.jpg

The rim placed on the tire

1710498530343.jpg

Disc brake on both sides, fork and mudguard

1710498530321.jpg

A piece of the handlebar

1710498530305.jpg

The top of the fork with the handlebar

1710498581210.jpg

1710498581194.jpg

The front finished and assembled dry (the handlebar axle will not be glued and will remain mobile during final assembly)

1710498581176.jpg
 

Attachments

  • 1710498530343.jpg
    1710498530343.jpg
    273.7 KB · Views: 2
Thank you all for your kind words

Another day of construction on the front of the bike and we start with the tire

View attachment 225294

The rim placed on the tire

View attachment 225296

Disc brake on both sides, fork and mudguard

View attachment 225297

A piece of the handlebar

View attachment 225298

The top of the fork with the handlebar

View attachment 225299

View attachment 225300

The front finished and assembled dry (the handlebar axle will not be glued and will remain mobile during final assembly)

View attachment 225303
WOW!!! :surprise::surprise::surprise::surprise:I concur with Z on this one. A tutorial on this would be great! Those tires look like they are made of rubber. Excellent job!:bowdown::bowdown::bowdown::bowdown: