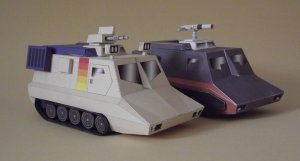
Buck Rogers Land Rover

A few props were designed and built for Buck in the first place and then repainted for BSG, too, because BSG got too expensive and Buck had a fresh budget. The EDD rifle and the Pumpkin shuttle (mockup & model) were two of them. The rifle and the matte painting of the space port from "Plot to kill a City" were later re-used in Star Trek: TNG.

Wow! Didn't know about that little fact about Star Trek! Too cool!

Sky Seeker
 
Draconian Rover unfolded and ready for testing! This time it's only four parts pages. ;)
I am ready for doing the BETA test build for you!

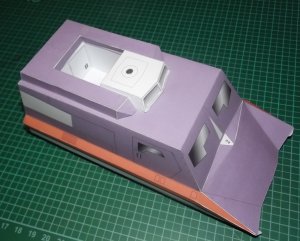
Next update: Land Rover Mk II has been unfolded and recoloured; some lines have to be tweaked a bit but it's looking great so far. :)
I am looking forward to seeing this one come together as well!
 
Short sitrep: First test build of the Draconian Rover discarded. The base colour was too light. New build with a darker colour will commence this eve (gotta get new "yellow" first ;) ).
 
Wow! Didn't know about that little fact about Star Trek! Too cool!

http://memory-alpha.wikia.com/wiki/...ran_II_in_Buck_Rogers_in_the_25th_Century.jpg

GuinanGun1.jpg

source: http://www.ditl.org/Images/G/GuinanGun1.jpg

9229deb80f8ee5d464ab0ca373d118ee43b218b1f679e1cf96cdf3a03b69a1af_medium
;)
 
Last edited:
  • Like
Reactions: Sky Seeker
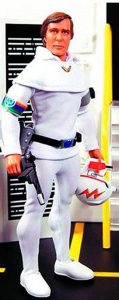
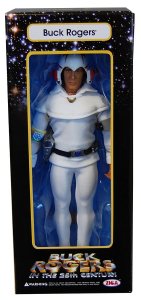
I will really have to build one of these and the StarFighter now. I've been on vacation this week and found one of the 8 inch Buck Rogers figures, in uniform with helmet, still in the box for only $25.00.

51ofm9C9eLL.jpg 71n6-+gVn9L._SL1500_.jpg
 
OK, here they are: :)

The basic layout is almost identical, however, there are fewer parts and the whole chassis is shaped like a box.

DSCF7328.jpg


Let's begin with the parts for the gunner station.

DSCF7329.jpg


DSCF7332.jpg


DSCF7330.jpg


DSCF7334.jpg


DSCF7335.jpg


DSCF7337.jpg


This is the first prototype. The colours have been revised. Please take a look at the next post. ;)
 

Attachments

  • DSCF7336.jpg
    DSCF7336.jpg
    139.1 KB · Views: 11
Last edited:
Since the colours were much too bright I corrected this and proceeded with the revised version. Here are two images which illustrate the difference:

DSCF7338.jpg


DSCF7339.jpg


Revised gunner station - in colour!

DSCF7342.jpg


Looks much better. :cool:

DSCF7340.jpg


The skeleton fits perfectly - no glue required.

DSCF7343.jpg


The wheel box covers:

DSCF7344.jpg


They are attached before the chassis is closed. So you have enough room to hold the parts in place and apply pressure to them while glue is curing.

DSCF7347.jpg


DSCF7346.jpg
 
The chassis box is closed:

DSCF7348.jpg


DSCF7351.jpg


The wheels and treads consist only of a stylized compact version since the covers do not allow a clear view at them. And detail-building something you don't see is somewhat illogical. :)

DSCF7352.jpg


DSCF7353.jpg


DSCF7354.jpg


DSCF7355.jpg


Next: The turret. :)
 
This looks really good. I like the darker colour.
I am looking forward to doing the BETA build!
 
The turret. Prepare yourself for the fiddly bits! ;)

DSCF7356.jpg


DSCF7357.jpg


I did not use the paper parts for the swivel joints but toothpicks instead. The paper rods (parts 25 & 28) are in the kit for you to determine the length of the rods and to actually use them on larger-scale versions.

DSCF7358.jpg


DSCF7359.jpg


DSCF7363.jpg


DSCF7364.jpg


DSCF7361.jpg


The handles.

DSCF7371.jpg


DSCF7369.jpg


A few bits and pieces later...

DSCF7375.jpg
 
The Draconial Rover looks FAN(FRAKKING)TASTIC!!!
I am thinking of using (paper) Q-tip handles instead of the toothpicks (so long as they are not too big for such).
Thank you for the templates. I will jump on the BETA build ASAP!

I am looking forward to seeing the MK-II build as well.