So sorry to see the tail spoiler. Those tyres are looking slickand the rest just wow.
Lancia Stratos
- Thread starter Chuffy70
- Start date
You are using an out of date browser. It may not display this or other websites correctly.
You should upgrade or use an alternative browser.
You should upgrade or use an alternative browser.
Thanks for the encouraging words, much appreciatedEerything looks so very clean, clear, and crisp! This is turning to be a very nice and informative thread. I like both what I see and read.
Great suggestions, but this model is a gift... If I were to build it for myself, then I'd possibly consider pimping my ride!Dude, build up the tail lights, that flat panels would be so easy to do. A piece of Red plastic for the lens, and an O-Ring for the rubber rim (they do sell square profile rubber O-rings), but if you look at the actual picture, the tail lights have rounded edges on them. Totally worth it, and will make the tail end of the car pop.
View attachment 227201
Just one of those things, I tried so many different way to make it look good, but hey-ho, you win some you lose some, and thanks for the lovely comment.So sorry to see the tail spoiler. Those tyres are looking slickand the rest just wow.
Thank you... I hated it for a time, then loved it a bit... we'll see how she turns out tomorrow when its all finished.It looks so damn good, I love it!!!
- Apr 5, 2013
- 14,109
- 10,664
The End... well at the finish of this post, it will all be over...
At the start of this build, I wasn't holding out much hope to produce a decent car model. most of my attempts at cars in paper form nearly always seems to end up with some kind of car-crash model which vaguely resembles to the real thing.
Most cars are best left to plastic/resin etc, were the body is preformed, thus getting a decent outcome.
I approached this one as a gift for a friend who loves this particular car in its rally form, and as @zathros had tempted me in, I thought why not give it a go!
You, my dear fellow modelers get to decide if I have done a decent job...
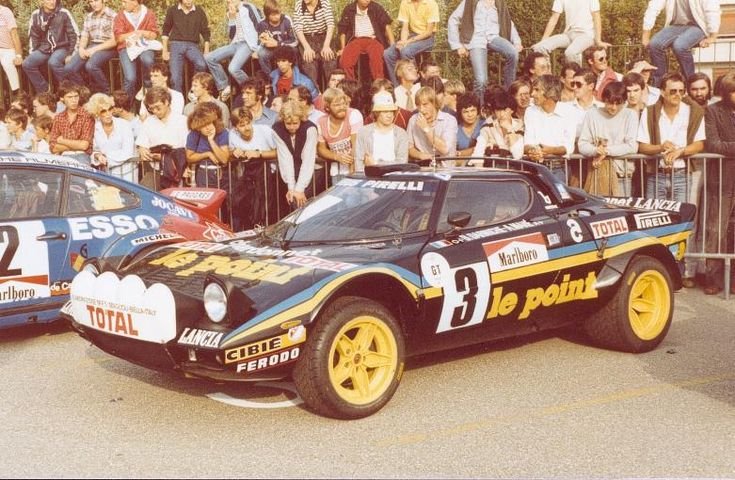
Below the real deal...
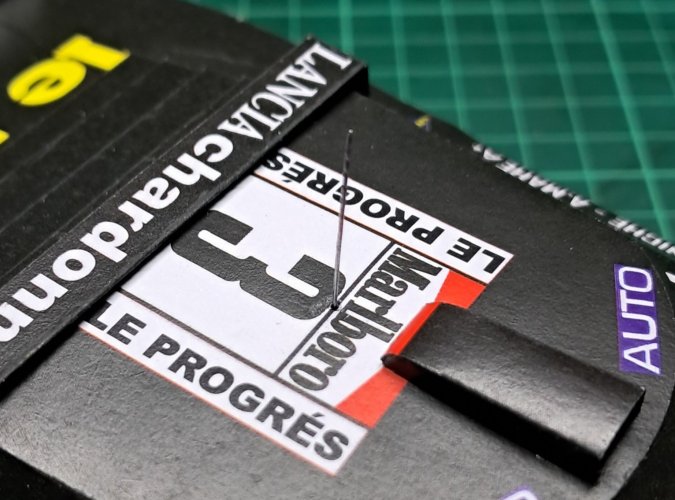
Final little details are as follows... Small aerial for the roof, made from some fairly robust electrical wire from some Halloween string lights that ceased to work.
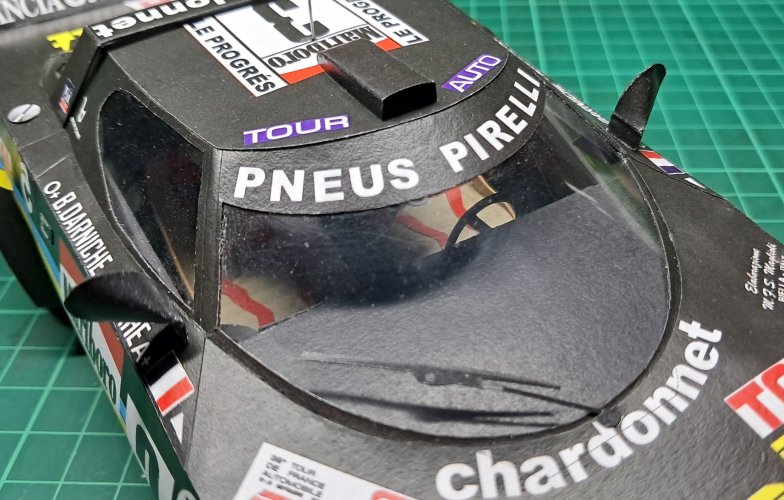
Windscreen wiper and Rear view/wing mirrors - NOTE THE POSITION - The so-called instructions have the mirrors mounted onto the white triangle ahead of the French tricolour...
Not the correct position, always do some research when building real life objects. The white triangle will be painted black before handing it over.
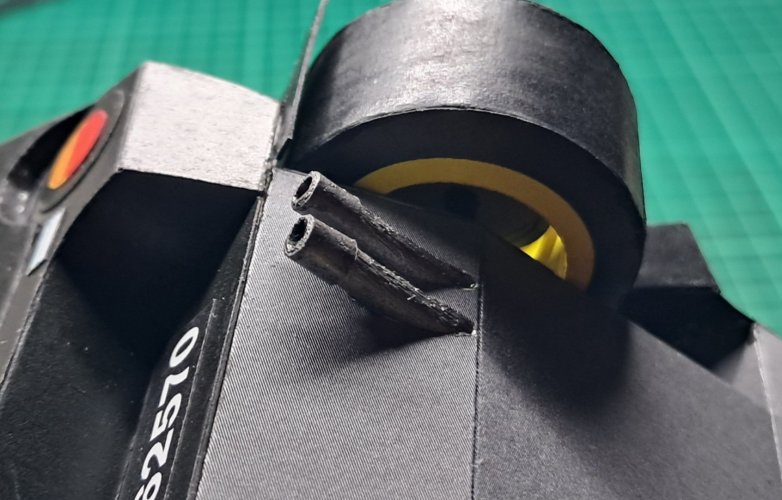
It was hard to find pictures of 'this' particular rally cars rear end, and as I had already cut the holes for the exhausts, they were going in the openings rightly or wrongly.
Most, if not all the rear ends show pipes either side of the car, not together, and with a box. The parts come with some bits, but once again, the instructions make no account of what goes where.
Thus this is all made up and not using the kit parts at all, just some wooden dowel the correct size for these particular holes, some paper around the ends to add a bit of something, holes drilled out and a lick of paint... which ends the build.
The finished article...
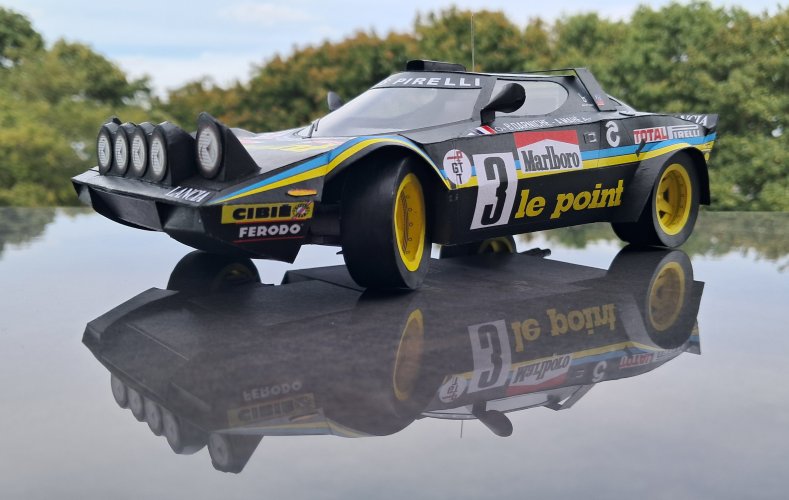
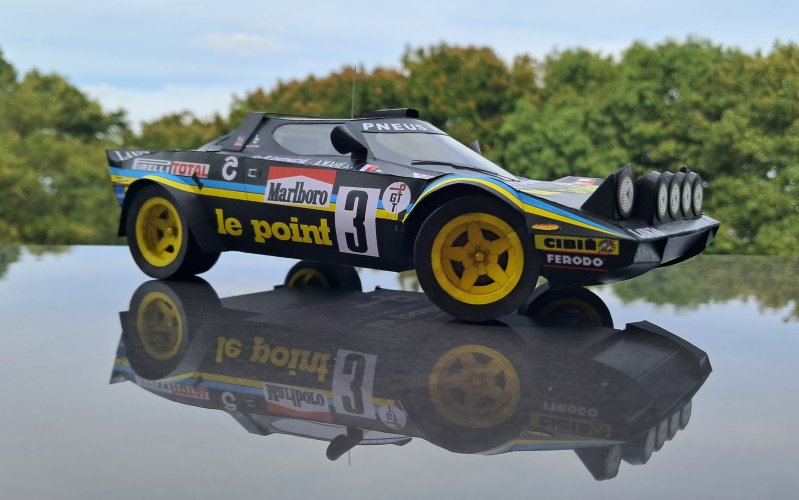
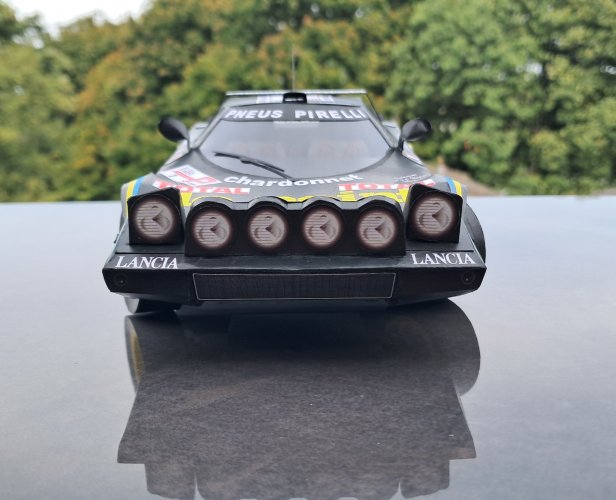
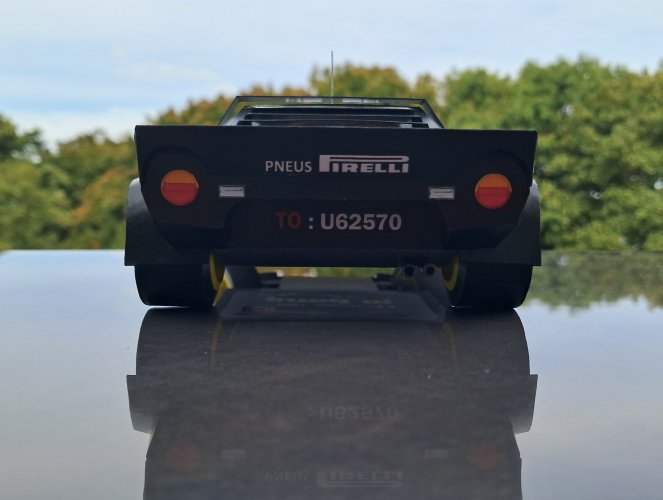
One last upgrade, was the wheel hubs, they are yellow beads which were left over from a craft puzzle... Pays sometimes to keep all sorts of rubbish!
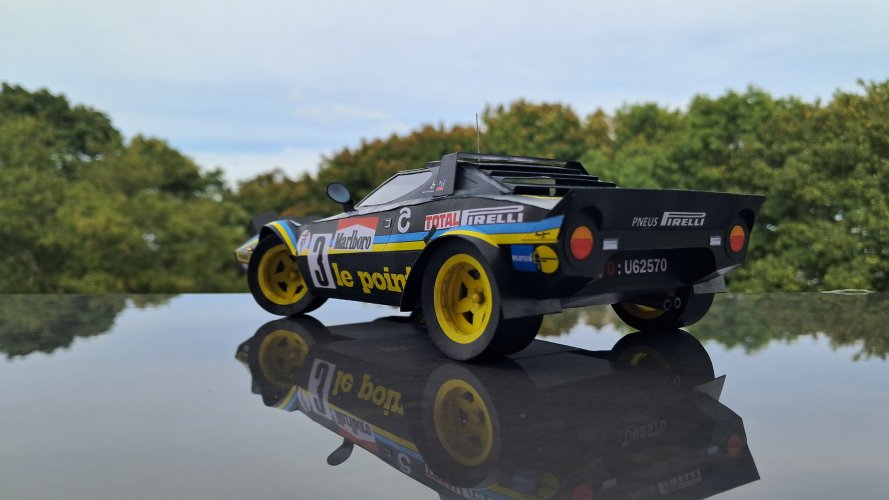
To sum up this build I'd say I did not really enjoy the experience at all, the instructions, which are not for this particular model anyway are very rudimentary.
Confusing part numbers for exactly the same parts, some fit issues with over and undersized parts, and too long staring at the plans to make out what is what!
In conclusion, its not turned out too bad, and thankfully in time for it to head to its new home next week, hopefully Paddy, the new owner will like what I've constructed.
Anyway, hoped you enjoyed the build, and now onto something else from the piles of unfinished projects...
THANKS FOR WATCHING...
At the start of this build, I wasn't holding out much hope to produce a decent car model. most of my attempts at cars in paper form nearly always seems to end up with some kind of car-crash model which vaguely resembles to the real thing.
Most cars are best left to plastic/resin etc, were the body is preformed, thus getting a decent outcome.
I approached this one as a gift for a friend who loves this particular car in its rally form, and as @zathros had tempted me in, I thought why not give it a go!
You, my dear fellow modelers get to decide if I have done a decent job...
Below the real deal...

Final little details are as follows... Small aerial for the roof, made from some fairly robust electrical wire from some Halloween string lights that ceased to work.

Windscreen wiper and Rear view/wing mirrors - NOTE THE POSITION - The so-called instructions have the mirrors mounted onto the white triangle ahead of the French tricolour...
Not the correct position, always do some research when building real life objects. The white triangle will be painted black before handing it over.

It was hard to find pictures of 'this' particular rally cars rear end, and as I had already cut the holes for the exhausts, they were going in the openings rightly or wrongly.
Most, if not all the rear ends show pipes either side of the car, not together, and with a box. The parts come with some bits, but once again, the instructions make no account of what goes where.
Thus this is all made up and not using the kit parts at all, just some wooden dowel the correct size for these particular holes, some paper around the ends to add a bit of something, holes drilled out and a lick of paint... which ends the build.

The finished article...


One last upgrade, was the wheel hubs, they are yellow beads which were left over from a craft puzzle... Pays sometimes to keep all sorts of rubbish!

To sum up this build I'd say I did not really enjoy the experience at all, the instructions, which are not for this particular model anyway are very rudimentary.
Confusing part numbers for exactly the same parts, some fit issues with over and undersized parts, and too long staring at the plans to make out what is what!
In conclusion, its not turned out too bad, and thankfully in time for it to head to its new home next week, hopefully Paddy, the new owner will like what I've constructed.
Anyway, hoped you enjoyed the build, and now onto something else from the piles of unfinished projects...

THANKS FOR WATCHING...
- Apr 5, 2013
- 14,109
- 10,664
Excellent build. Excellent final glamor shots!! Comment a "decent job" would be an understatement. 
Self critique, the model builders worst enemy! Having said that, I'll take your 'excellent' with open arms, thanks muchly.Excellent build. Excellent final glamor shots!! Comment a "decent job" would be an understatement.
The poseable wheels help sell it, but far from 'The Real Thing' If the thread helps someone build one, then all the work on this model will be ratified.Chuffy I think you did a great job it looks like the real thing. This thread is the tutorial you have to follow when building this model.
Thank you for your wonderful comment.
I agree totally with zathros and mijob. This is a very well made car.
Minor differences in sizes or positions came from the model itself and have nothing to say about your skills.
I myself do not want to engage in a car model for the same reasons you already mentioned.
I did once the Vespa from UHU02 with all it's curves and roundings. That was not an easy one and i did some parts several times until i got them right.
The new owner should be more than happy to get such a nice model of his favorite car.
Congratulations, very well done.
Thanks for your observations and kind comments, taking yourself out of the 'comfort zone' can only improve your skill set, I have the Vespa in the 'to do file' with rider... I suppose its the beauty of paper, that its easy to try, try, and try againI agree totally with zathros and mijob. This is a very well made car.
Minor differences in sizes or positions came from the model itself and have nothing to say about your skills.
I myself do not want to engage in a car model for the same reasons you already mentioned.
I did once the Vespa from UHU02 with all it's curves and roundings. That was not an easy one and i did some parts several times until i got them right.
The new owner should be more than happy to get such a nice model of his favorite car.
Congratulations, very well done.
Hopefully Paddy, the new owner will take a picture of the Stratos he built last year, alongside my meagre offering, so that I can post it here.
Appreciate your kind comment, thank youVery nice and clean work. Congratulations.
Awwww, so nice of you, I passed on your comment and the car blushedI love it!!!
