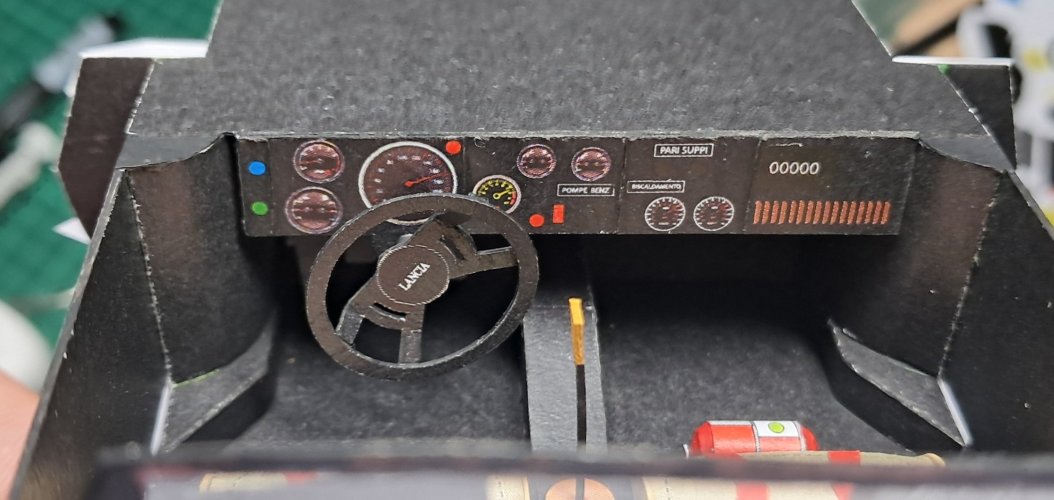
Great fix on the dash. Only the last picture doesnt show up.
Lancia Stratos
- Thread starter Chuffy70
- Start date
You are using an out of date browser. It may not display this or other websites correctly.
You should upgrade or use an alternative browser.
You should upgrade or use an alternative browser.
Its the by-product of having my prints professionally printed, rather than home printed, my printer is useless!I like the crisp printing quality!
Stratos build continues... and fast approaching some sort of conclusion - Hopefully by the end of the week!?
(must be completed by mid August!)
Main body work upper is now nearly finished, apart from the front wings/wheel arches.
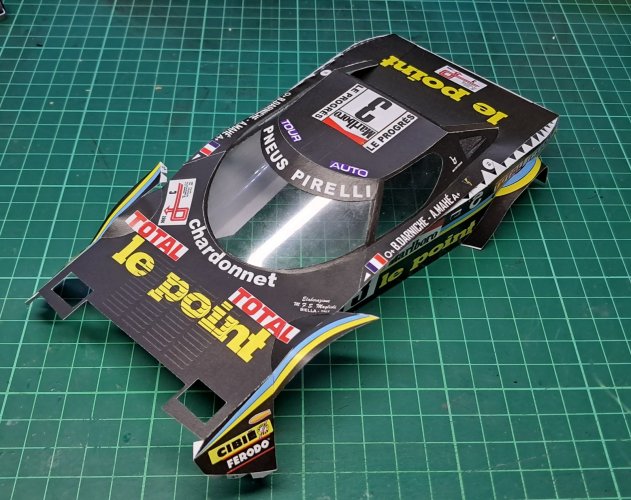
Starting at the back end, the upper is now joined to the lower half.
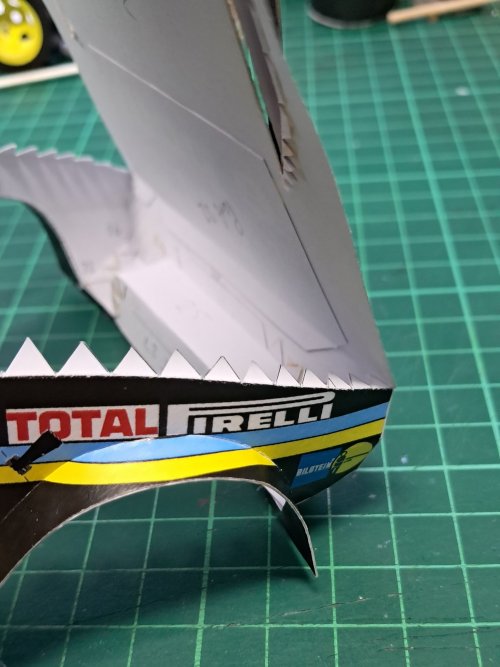
Apart from a small lip on the right hand side, the back joined up very nicely.
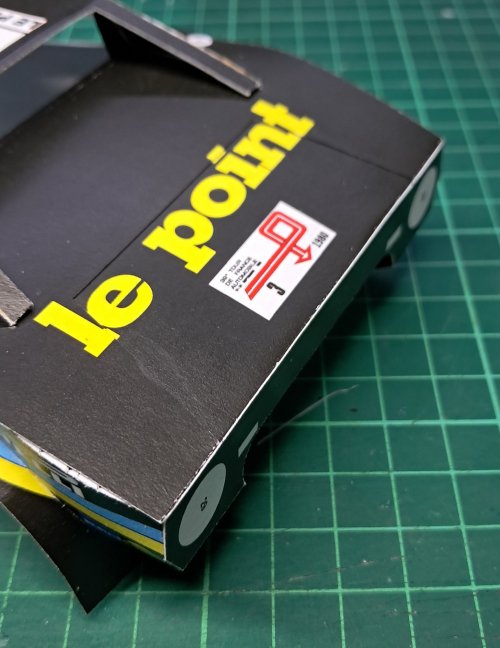
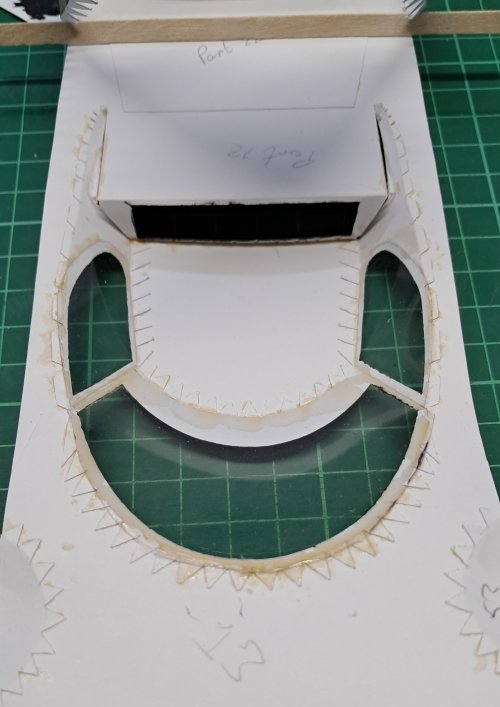
As seen in the first photo in this segment, the glazing is now inside.
The two smaller side windows were put in first which created a lip for the sides of the main windscreen to sit next to and aid the fitment of the main screen..
The larger piece was taken high to the roof section which allowed the clear plastic to naturally flow without over stressing the frames or body when gluing in.
With the new flip-top Stratos like it is, the inner white sections were given a couple of coats of black paint to the areas which might be able to seen from the outside. Not pretty, but hopefully you will not see it, although Johnny 5 looks spooked by the paint job!
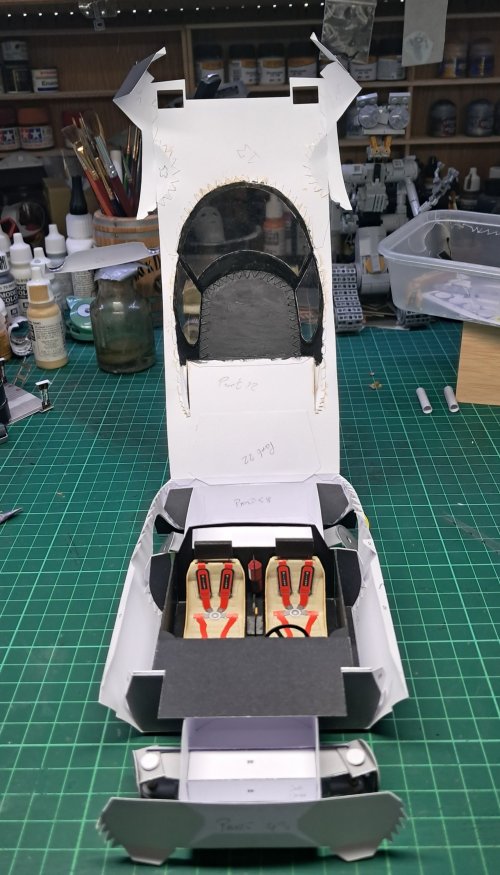
With the roof like this, checks can be made to see if all is in order - note the wheel wells are not coloured, so you may want to address this at this stage.
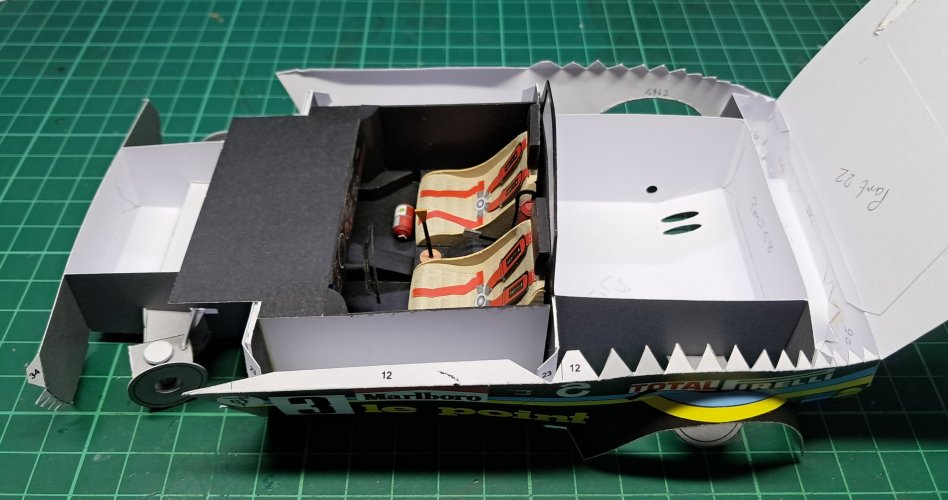
Primary checks looked good, and I progressed one tab at a time on both the left and righthand sides.
This side is the better of the two.
Apparently we all have a good side?
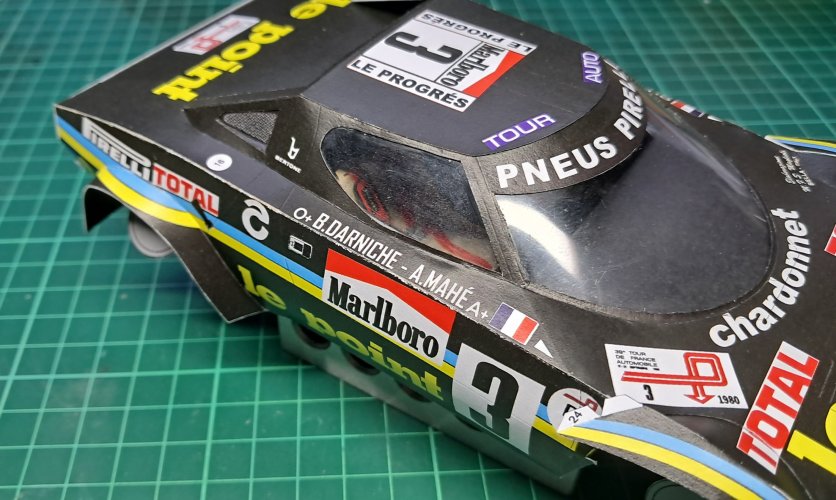
This side suffered a small divot around the door handle, which was builder error for not holding the glued parts for long enough!!!
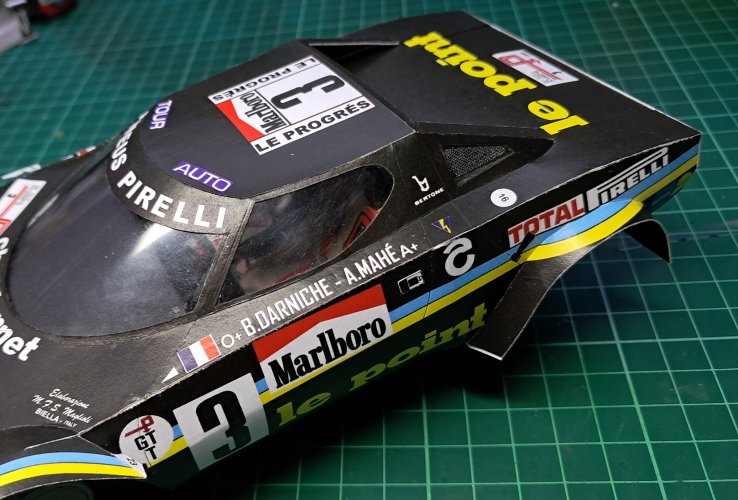
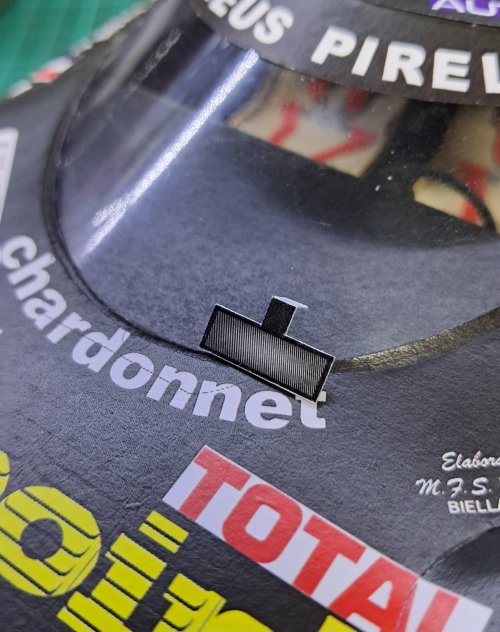
"more haste, less speed!" without build instructions, and making it up as you go, things get forgotten - like the rear view mirror.
I'm guessing rally drivers very rarely used these, and with the slats to be added there would be very little to see anyway... crisis avoided
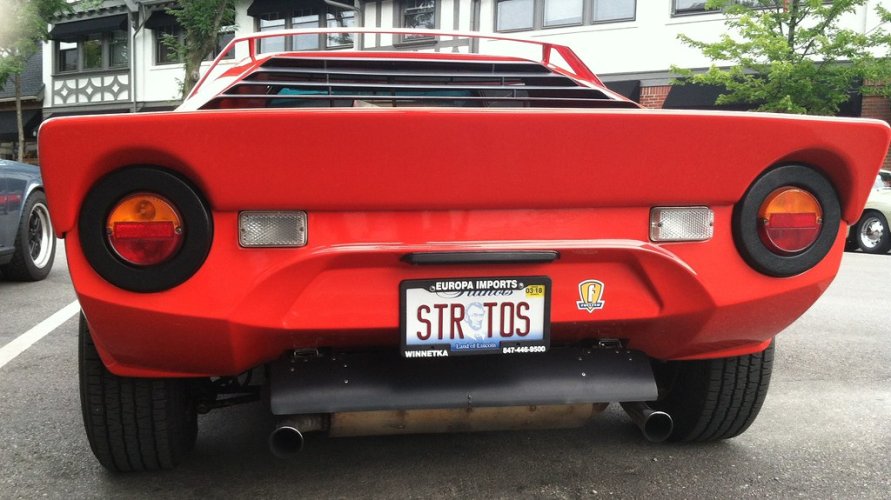
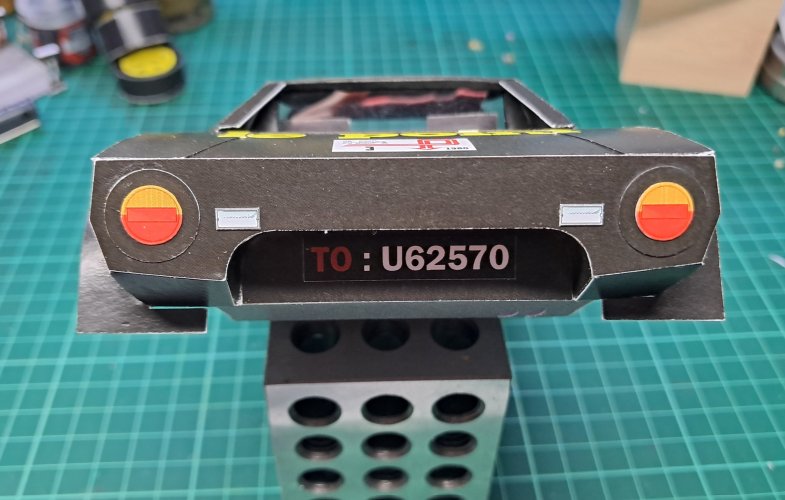
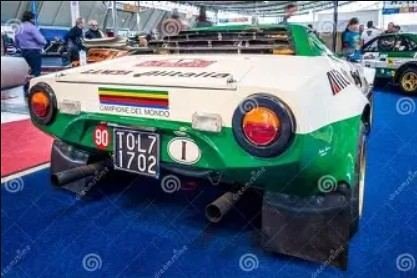
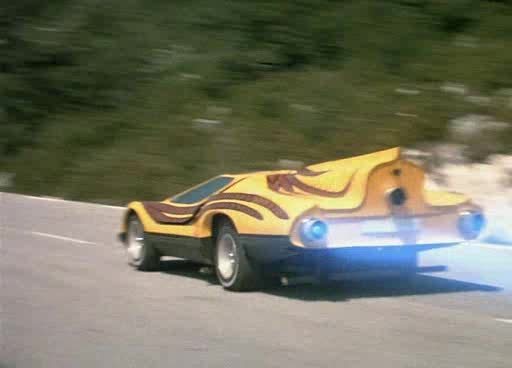
Rear main lights and reversing lights added, but looking at a picture of the real car, the main rears would look better laminated to around 3-4 layers thick, with the lens being sunk into it.
Check the following picture of the real car to make your own observations.
Attention away from the rear lights, time for the front ones.
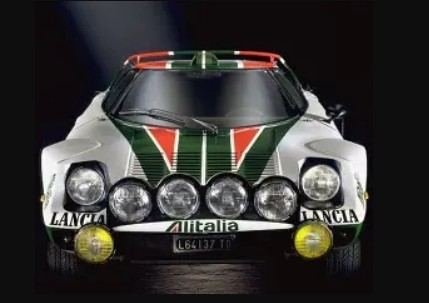
All the front light lenses are the same pictorially, but two are slightly bigger, so be careful!
however the laminated pieces to go behind them are strangely the same size.
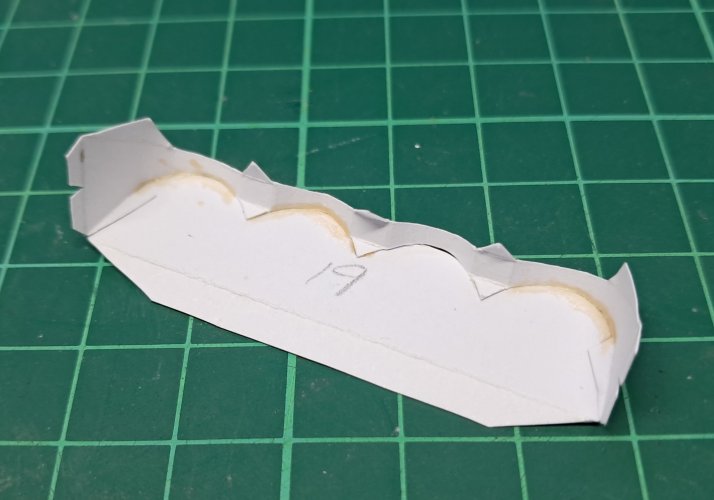
Part 19 called out in blue is to my knowledge a blank to simulate the cover which goes over the main spot lights, and quite frankly looks terribly executed.
Parts 29 were for the rears.
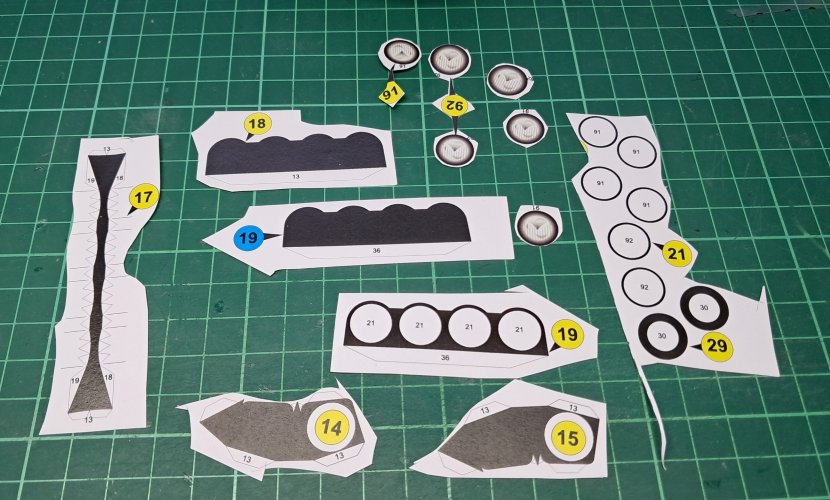
Pop up lights and main spots under construction.
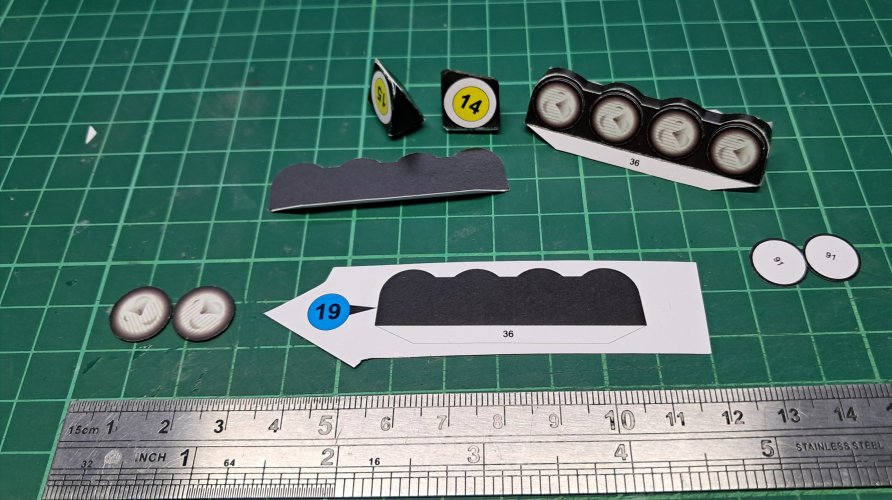
Tabs for the main sides of the ridge section were kept, but shortened below the curved edge, also the tabs for the three straight centre sections were also kept.
The centre tab glued first, then the arch sectioned had their tabs removed and curved by used of a cocktail stick to form a curved edge, then all the rounded edges were glued. (one still to be done)
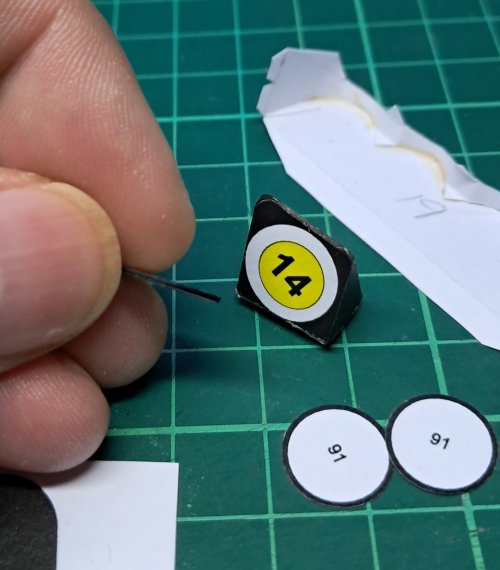
Doing away with the smaller laminate parts than the actual light lens, I then added two of my own laminated circles, slightly beveling the cut with scissors as I went round the part, just to give them a slightly different look to the spots. It will be hardly noticeable, but I'll know.
ALL FOR NOW, AND THANKS FOR WATCHING...
(must be completed by mid August!)
Main body work upper is now nearly finished, apart from the front wings/wheel arches.

Starting at the back end, the upper is now joined to the lower half.

Apart from a small lip on the right hand side, the back joined up very nicely.

As seen in the first photo in this segment, the glazing is now inside.
The two smaller side windows were put in first which created a lip for the sides of the main windscreen to sit next to and aid the fitment of the main screen..
The larger piece was taken high to the roof section which allowed the clear plastic to naturally flow without over stressing the frames or body when gluing in.

With the new flip-top Stratos like it is, the inner white sections were given a couple of coats of black paint to the areas which might be able to seen from the outside. Not pretty, but hopefully you will not see it, although Johnny 5 looks spooked by the paint job!

With the roof like this, checks can be made to see if all is in order - note the wheel wells are not coloured, so you may want to address this at this stage.

Primary checks looked good, and I progressed one tab at a time on both the left and righthand sides.
This side is the better of the two.
Apparently we all have a good side?

This side suffered a small divot around the door handle, which was builder error for not holding the glued parts for long enough!!!

"more haste, less speed!" without build instructions, and making it up as you go, things get forgotten - like the rear view mirror.
I'm guessing rally drivers very rarely used these, and with the slats to be added there would be very little to see anyway... crisis avoided

Rear main lights and reversing lights added, but looking at a picture of the real car, the main rears would look better laminated to around 3-4 layers thick, with the lens being sunk into it.
Check the following picture of the real car to make your own observations.


Attention away from the rear lights, time for the front ones.

All the front light lenses are the same pictorially, but two are slightly bigger, so be careful!
however the laminated pieces to go behind them are strangely the same size.
Part 19 called out in blue is to my knowledge a blank to simulate the cover which goes over the main spot lights, and quite frankly looks terribly executed.
Parts 29 were for the rears.

Pop up lights and main spots under construction.

Tabs for the main sides of the ridge section were kept, but shortened below the curved edge, also the tabs for the three straight centre sections were also kept.
The centre tab glued first, then the arch sectioned had their tabs removed and curved by used of a cocktail stick to form a curved edge, then all the rounded edges were glued. (one still to be done)

Doing away with the smaller laminate parts than the actual light lens, I then added two of my own laminated circles, slightly beveling the cut with scissors as I went round the part, just to give them a slightly different look to the spots. It will be hardly noticeable, but I'll know.

ALL FOR NOW, AND THANKS FOR WATCHING...
Awesome!!! I love those lines. I noticed that the rear section looks almost exactly like the rear section of the car model I am working on, so mine should be a nice companion to the Stratos. 
Cheers... I think I might have guessed it... goes by the name of Wet Nellie perchance?Awesome!!! I love those lines. I noticed that the rear section looks almost exactly like the rear section of the car model I am working on, so mine should be a nice companion to the Stratos.
No Lotus, sorry.
"BUT! ... You have a point there!"
It's from a movie..!
"BUT! ... You have a point there!"
It's from a movie..!
Unfortunately, it's only now that I have the opportunity to be there again. I will continue to follow this model, very good instructions. Keep up the good work... 
…and I thought I had it! Apart from Condorman, but the back looks totally different, and from what I remember didn't go underwater - or some animated film I'm stumped... I look forward to seeing what you present with an point at screen and say "ah, it was that!"No Lotus, sorry.
"BUT! ... You have a point there!"
It's from a movie..!
Thank you @Walter2 - most, if not all of the instructions given are completely made up on the spot- the instruction or plan given with the download in the resource section does not apply to this particular model.Unfortunately, it's only now that I have the opportunity to be there again. I will continue to follow this model, very good instructions. Keep up the good work...
Hopefully by the end of the build I will have the rest of the models and appropriate plans to add to the resources, or add as pictures on this thread.
I hope you continue to tune in
There is only one man who can save Princess Juliet from the clutches of the evil Count Lorca!…and I thought I had it! Apart from Condorman, but the back looks totally different, and from what I remember didn't go underwater - or some animated film I'm stumped... I look forward to seeing what you present with an point at screen and say "ah, it was that!"
View attachment 227002
Thank you @Walter2 - most, if not all of the instructions given are completely made up on the spot- the instruction or plan given with the download in the resource section does not apply to this particular model.
Hopefully by the end of the build I will have the rest of the models and appropriate plans to add to the resources, or add as pictures on this thread.
I hope you continue to tune in

Nearly there, he said thinking I would have been done by now!
The front of the car now seems to resemble a Manta Ray...
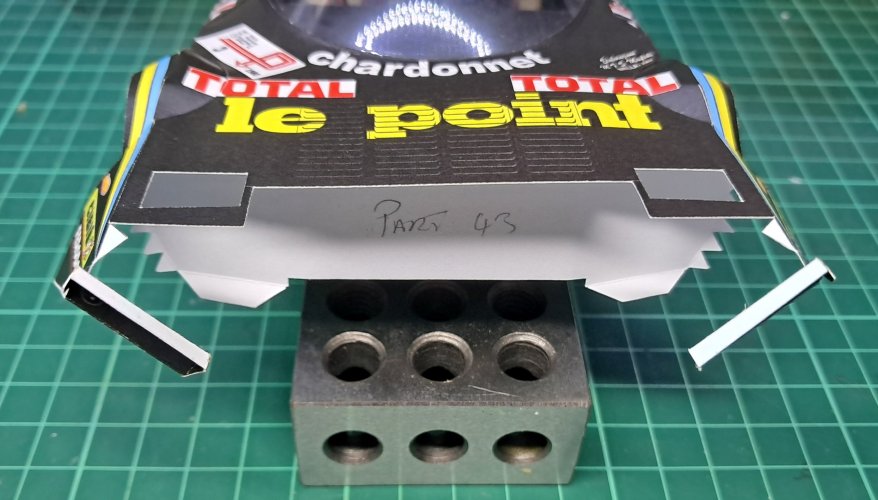
The front side lights are attached to a portion that runs under the front of the car.
After some dry fitting I decided to attach it to the side wings first.
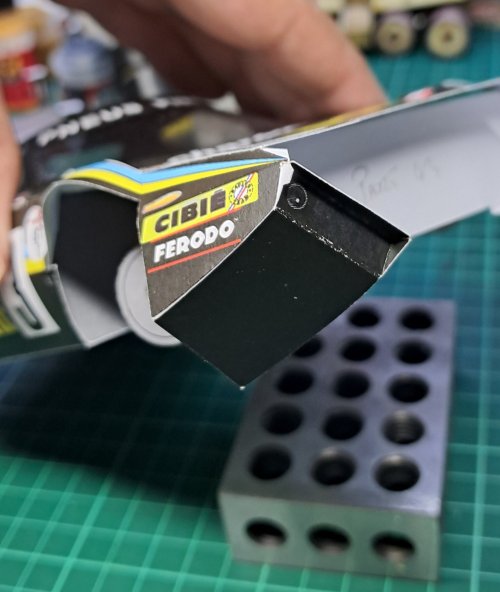
Front bumper/radiator section was joined to the side wing first before attaching to the front bonnet/hood.
There's quite a lot that needs to fit here, of which dry fitting and testing is crucial on this area.
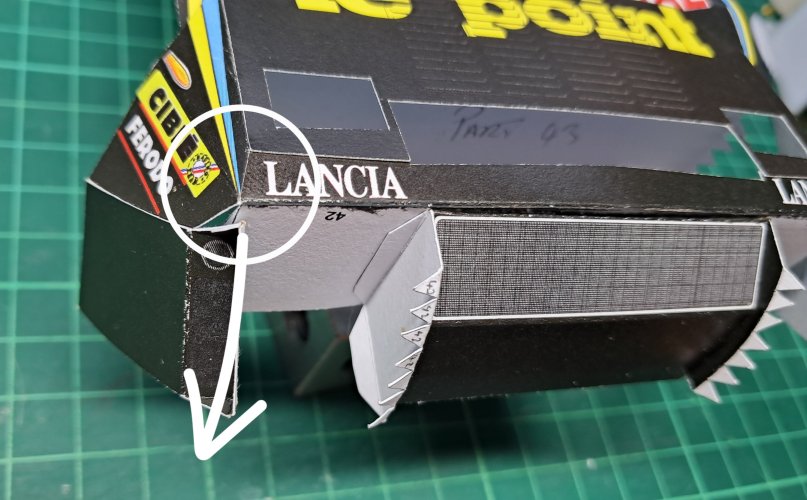
The side lights have a small tab which extends from the part, but due to some research I'm unable to see what this has to with anything, so it was cut off.
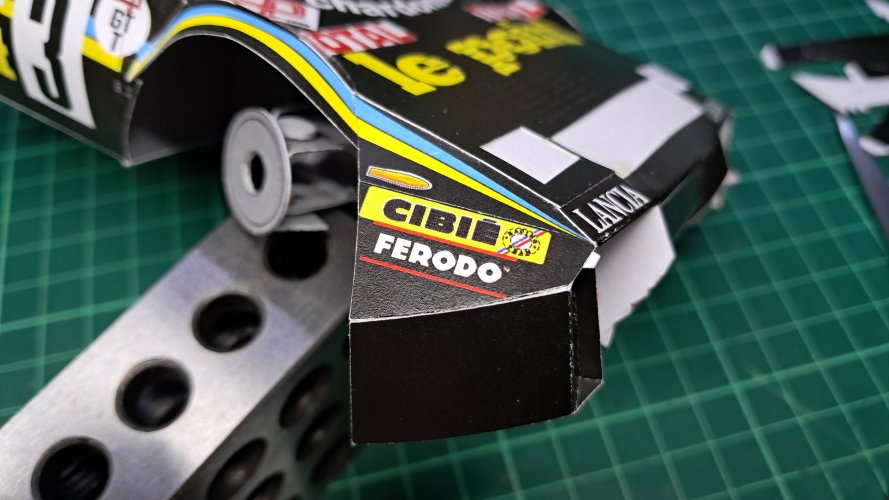
The central section from the radiator between the the two side light section may be too long.
During construction of all these parts it was noted it seemed to be a bit long. but I left it off until all these parts came together.
Instead of cutting it back, I decided the fit here was good enough, with most if not all parts coming together within acceptable parameters.
The small step will be painted black to blend in.
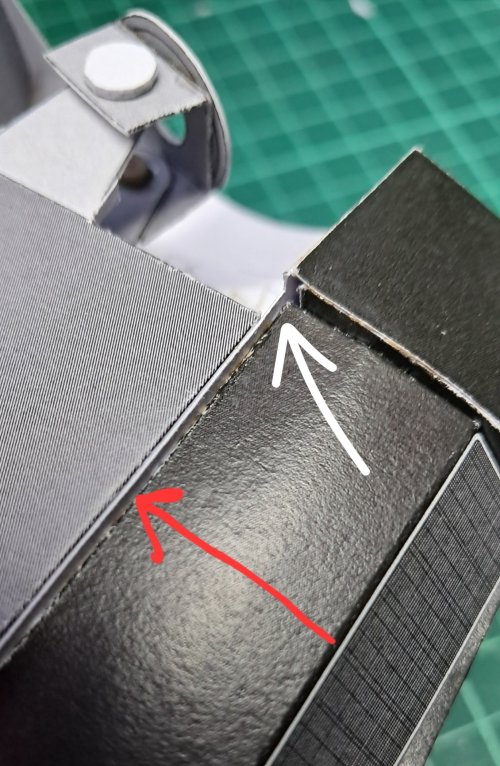
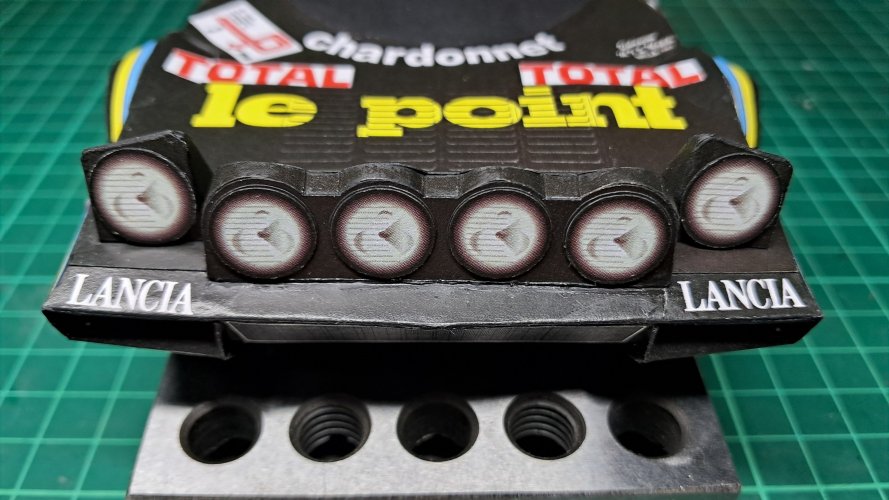
Areas that were cut out for the head and spot lights were filled in again, as the folding of the lights under here was work that really is unnecessary, and I feel leaves the area to warping out of control.
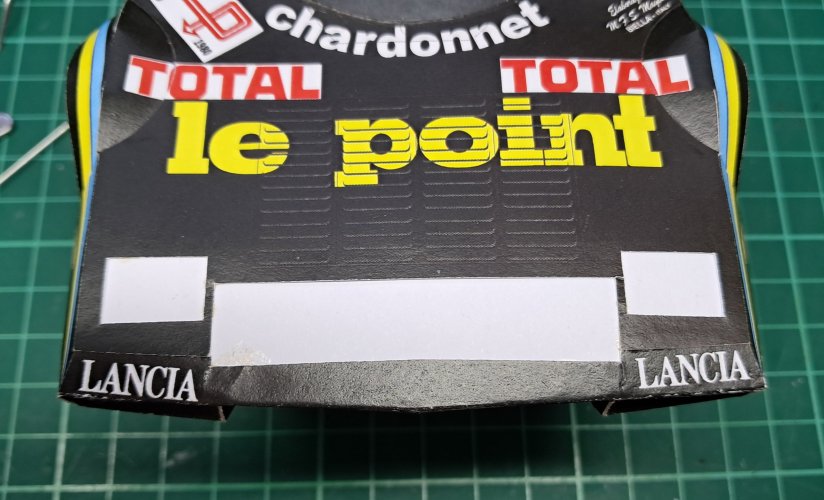
With areas filled in, all tabs were cut off and all lights were flush mounted.
This finishes the front end.
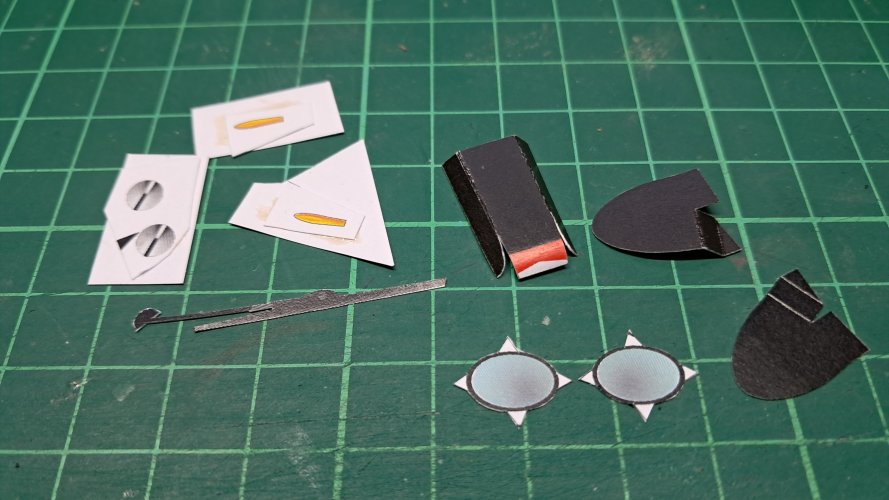
Looking through some of the smaller parts left over, it was what some may call 'greeblie time'
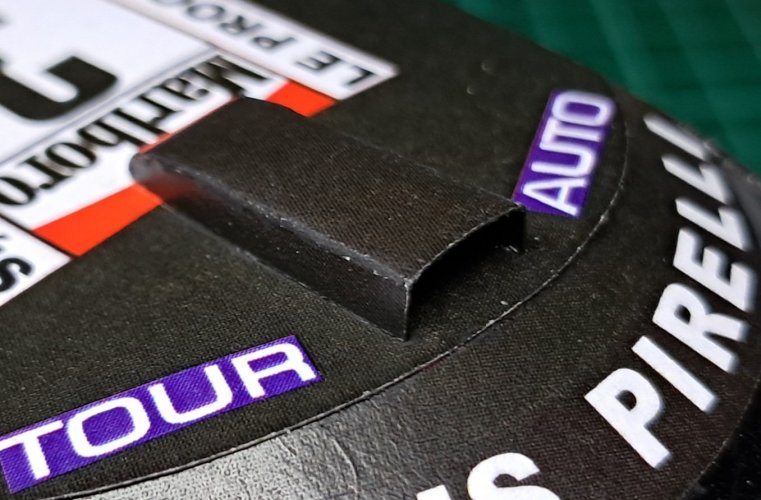
Top thingy, probably some kind of air scoop for fresh air in the cabin?
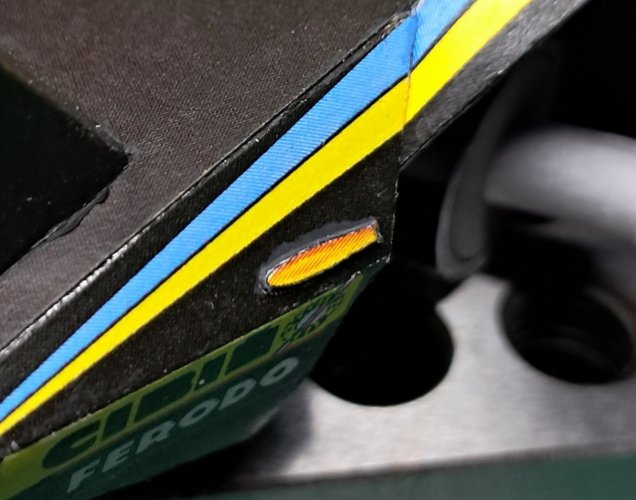
Side indicators were doubled up to make them stand out.
These close up pics show the painted edges which look horrible at this range, thankfully they are not this visible from a normal viewing position.
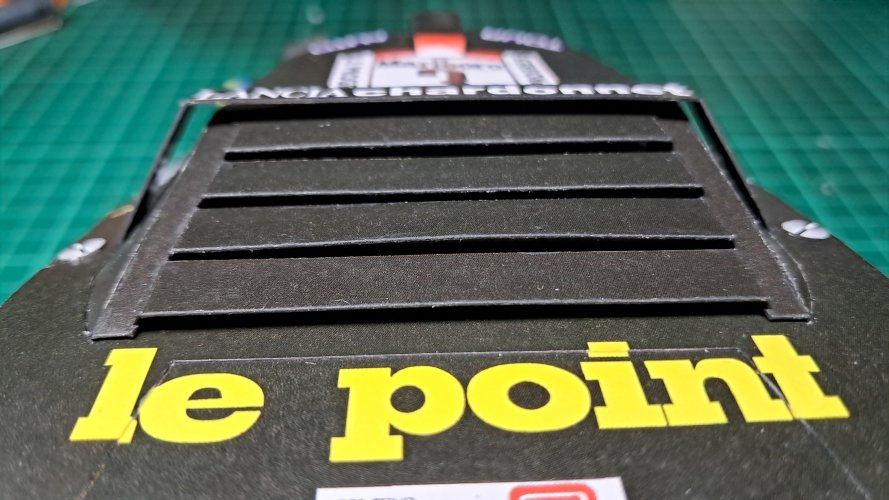
Rear slats finally added, a little bit of bow, but they look okay-ish.
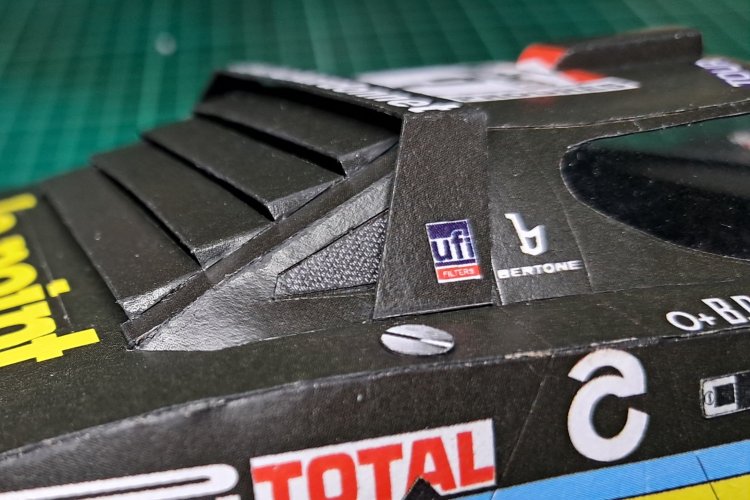
Side view showing my interpretation of the slats, as the kit parts looked wrong in my references.
Over the roof spoiler added, along with fuel filler caps.
THAT'S ALL FOR THIS ADDITION, HOPEFULLY TOMORROW I'LL UPLOAD FITTING THE WHEELS, WIPER AND REAR SPOILER...
The front of the car now seems to resemble a Manta Ray...

The front side lights are attached to a portion that runs under the front of the car.
After some dry fitting I decided to attach it to the side wings first.

Front bumper/radiator section was joined to the side wing first before attaching to the front bonnet/hood.
There's quite a lot that needs to fit here, of which dry fitting and testing is crucial on this area.

The side lights have a small tab which extends from the part, but due to some research I'm unable to see what this has to with anything, so it was cut off.

The central section from the radiator between the the two side light section may be too long.
During construction of all these parts it was noted it seemed to be a bit long. but I left it off until all these parts came together.
Instead of cutting it back, I decided the fit here was good enough, with most if not all parts coming together within acceptable parameters.
The small step will be painted black to blend in.

Areas that were cut out for the head and spot lights were filled in again, as the folding of the lights under here was work that really is unnecessary, and I feel leaves the area to warping out of control.

With areas filled in, all tabs were cut off and all lights were flush mounted.
This finishes the front end.

Looking through some of the smaller parts left over, it was what some may call 'greeblie time'

Top thingy, probably some kind of air scoop for fresh air in the cabin?

Side indicators were doubled up to make them stand out.
These close up pics show the painted edges which look horrible at this range, thankfully they are not this visible from a normal viewing position.

Rear slats finally added, a little bit of bow, but they look okay-ish.

Side view showing my interpretation of the slats, as the kit parts looked wrong in my references.
Over the roof spoiler added, along with fuel filler caps.

THAT'S ALL FOR THIS ADDITION, HOPEFULLY TOMORROW I'LL UPLOAD FITTING THE WHEELS, WIPER AND REAR SPOILER...
You can indeed @Walter2May I ask which glue you use? It doesn't look like wood glue.
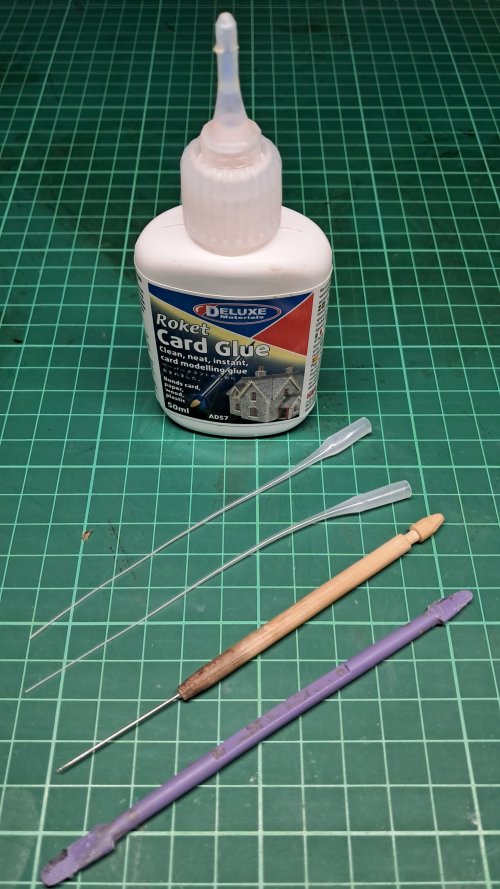
I use Roket Card Glue as my main go-to, it bonds paper almost instantly, but certainly within 10 seconds. Some curves or bends with a slight amount of stress takes about 30 seconds holding the part - more awkward bits can take longer, but nowhere near the drying time of normal PVA/wood glues.
It soaks into the paper on the first application to bare edges, thus sometimes a slight second coat is needed if the part is printed, as with all tools it takes a few mistakes, happy accidents and a small learning curve to get the best results.
Splurges and spills can be mopped up with slightly wet cotton buds or rags, and dried on glue can be removed by rubbing a tool made of silicone (see purple thingy in pic)
I also use UHU for larger areas and superglue - UHU Gel is the best of the brand, but hard to find.
Any other questions or queries please ask
Now I have to find me some of that.You can indeed @Walter2
I use Roket Card Glue as my main go-to, it bonds paper almost instantly, but certainly within 10 seconds. Some curves or bends with a slight amount of stress takes about 30 seconds holding the part - more awkward bits can take longer, but nowhere near the drying time of normal PVA/wood glues.
It soaks into the paper on the first application to bare edges, thus sometimes a slight second coat is needed if the part is printed, as with all tools it takes a few mistakes, happy accidents and a small learning curve to get the best results.
Splurges and spills can be mopped up with slightly wet cotton buds or rags, and dried on glue can be removed by rubbing a tool made of silicone (see purple thingy in pic)
I also use UHU for larger areas and superglue - UHU Gel is the best of the brand, but hard to find.
Any other questions or queries please ask
View attachment 227190
- Apr 5, 2013
- 14,017
- 10,496
- 228
If you ever build another one of these cars, you will find that 110lb. stock is the thickest you will need. You can laminate it if you feel you need thicker, and some parts use 67lb. stock. When I made the McLaren M8,, I found that any thicker paper introduced accrued intolerance, and introduced gaps. 
Onto the final stretch... but not quite yet, as this here is the penultimate post of the Stratos build.
Hopefully by Thursday this week I can get some beauty shots of the finished article.
Anyway here's some more paper folded into what looks like a Lancia.
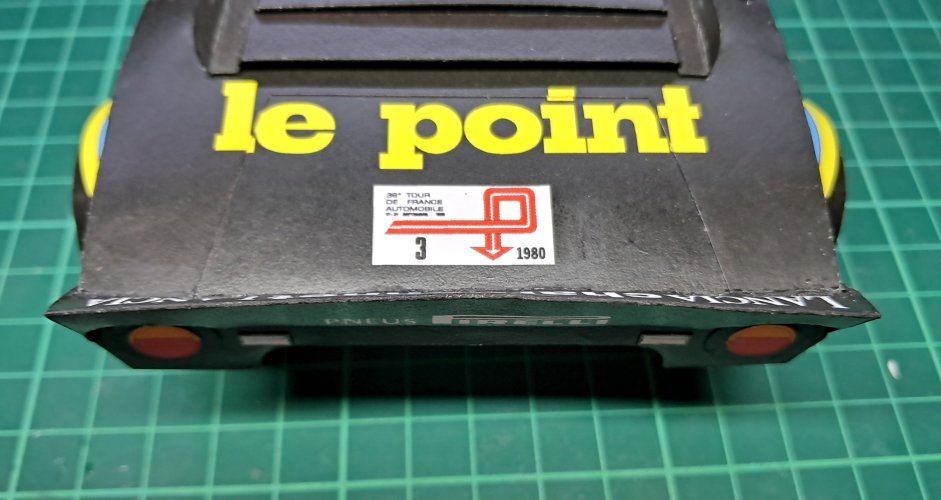
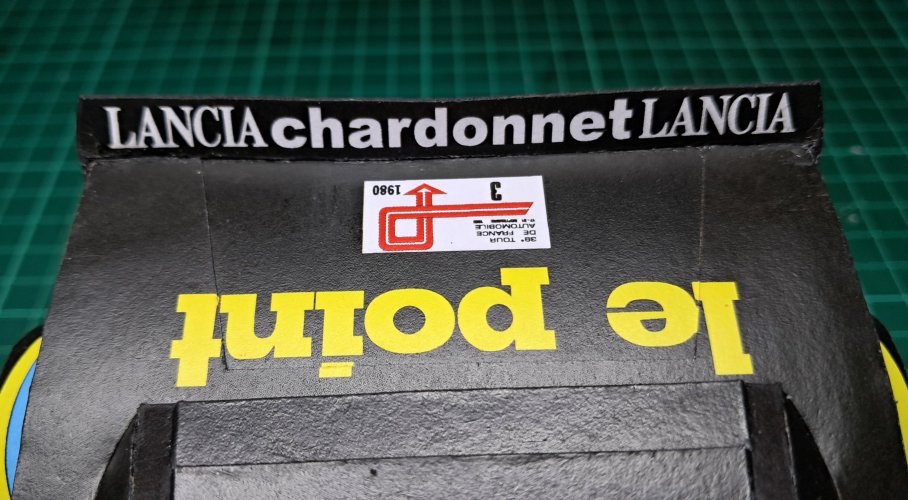
Resembling a dogs dinner rather than a rear spoiler, this part was a pain in the arse to fit.
In the end I just gave up and glued it to where it wanted to go, I nearly left it off altogether!!!
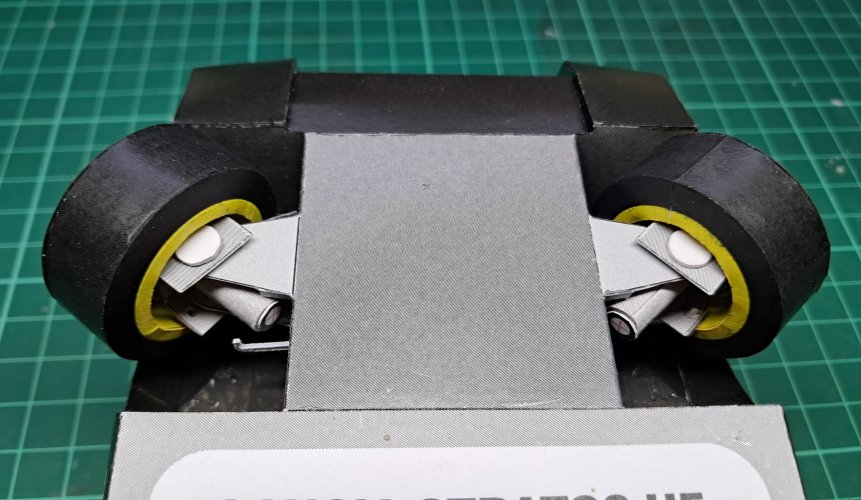
Onto fitting the wheels - the back has a straight axle which I mentioned earlier in the build, of which the paper version was replaced with a wooden dowel...EASY!
On the front, much the same part is produced in paper form and weirdly only one printed, thus wooden dowel of the same diameter was going to used.
Not as yet having of the rubber liquid electrical tape as recommended by @zathros or black rubber paint, I decided to use some graphite from an old carpentry pencil to rub over the tyre area. This dulled down the sheen on the black just enough to remove itself from looking like the bodywork.
LEFT treated - RIGHT un-treated subtle difference, but I think enough.
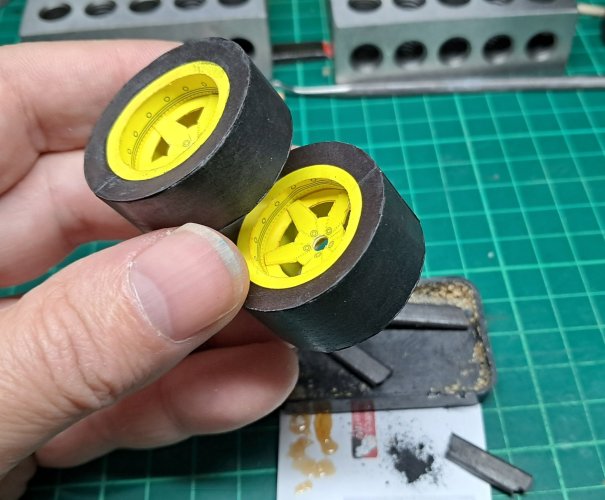
As the front wheels are steerable, I couldn't put the axle all the way through, well I could, but then they would not turn. "Doh!"
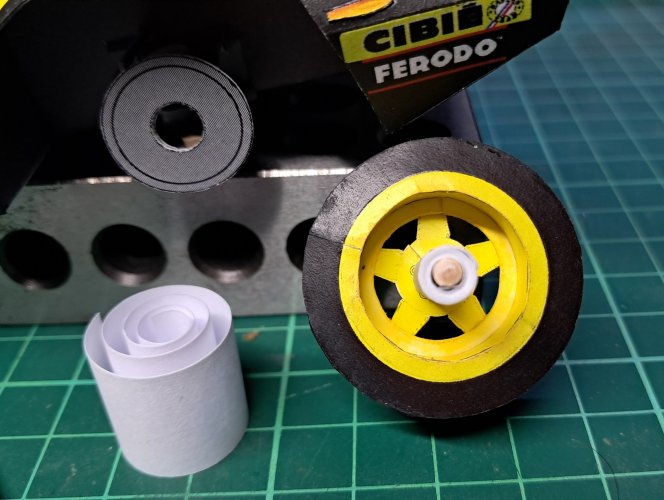
Now as I wanted the wheels to spin so to speak, the shaft, both seen here as grey tubes are the same diameter as the hole in the disc brakes.
My now wooden dowels are not... Having a bit of a think (which required a lay down afterwards!') I came up with this solution.
Taking a strip of paper the same length as the wooden dowel, I wrapped the strip tightly until it became the same diameter as the inner diameter of the grey tubes.
The two small discs will become apparent later.
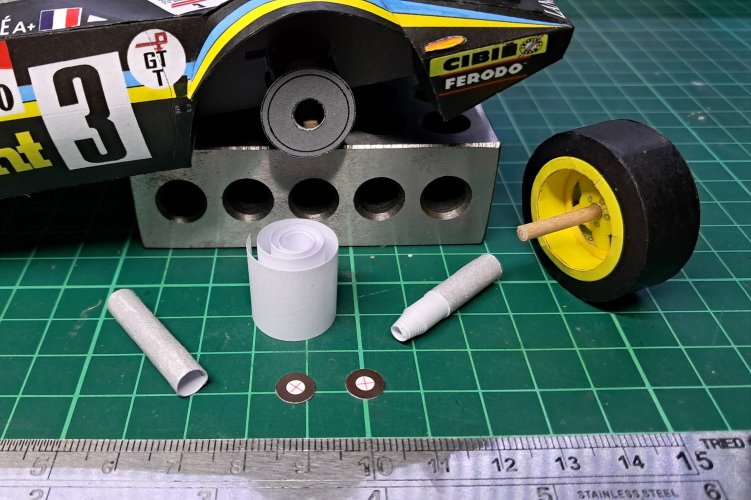
With the strip pushed inside the grey tube, the wooden axle can now sit nicely inside and rotate.
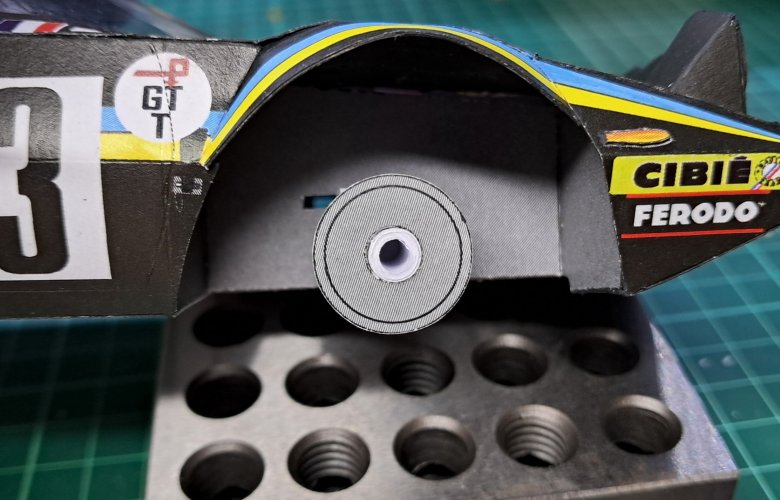
As the wooden axle is just shy of 0.5mm longer than the grey tube, the circular disc (left over from un-used parts on the sheet) can be placed on the end to allow the wheel to turn.
*NOTE THE DISC IS TO BE ATTACHED LATER.
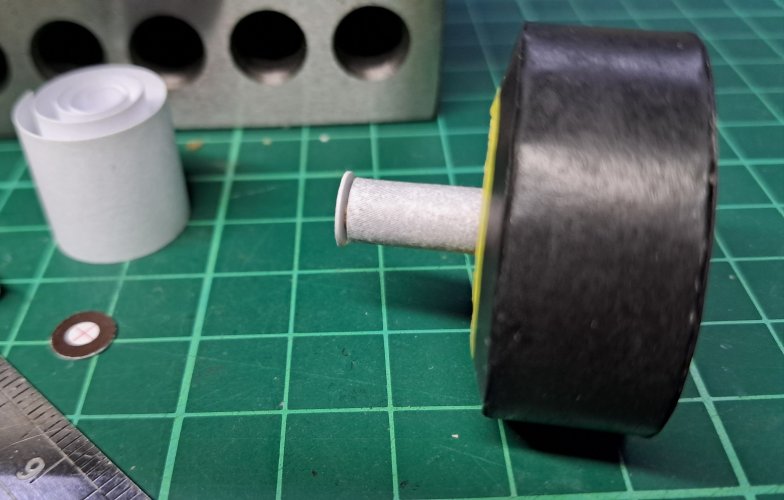
Removing the steering arm allows me to turn the hubs so the rear of the axle is accessible to put the disc onto the wooden dowel.
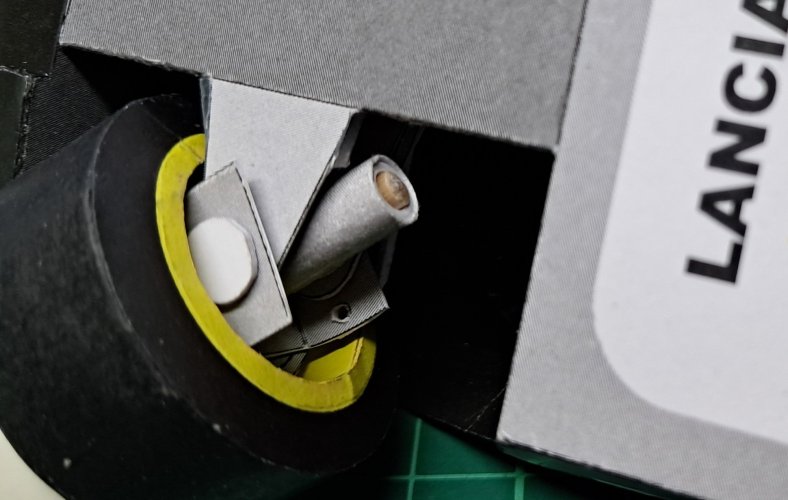
Both small discs attached to wooden dowels allowing for freewheeling... erm, well wheels!
If you don't want the wheels to turn, ignore all this mumbo-jumbo and just glue your wheels to the hub, easy-peasy!
THAT'S ALL FOR NOW, TUNE IN THURSDAY FOR THE BIG, well the small reveal
Hopefully by Thursday this week I can get some beauty shots of the finished article.
Anyway here's some more paper folded into what looks like a Lancia.
Resembling a dogs dinner rather than a rear spoiler, this part was a pain in the arse to fit.
In the end I just gave up and glued it to where it wanted to go, I nearly left it off altogether!!!


Onto fitting the wheels - the back has a straight axle which I mentioned earlier in the build, of which the paper version was replaced with a wooden dowel...EASY!
On the front, much the same part is produced in paper form and weirdly only one printed, thus wooden dowel of the same diameter was going to used.
Not as yet having of the rubber liquid electrical tape as recommended by @zathros or black rubber paint, I decided to use some graphite from an old carpentry pencil to rub over the tyre area. This dulled down the sheen on the black just enough to remove itself from looking like the bodywork.
LEFT treated - RIGHT un-treated subtle difference, but I think enough.

As the front wheels are steerable, I couldn't put the axle all the way through, well I could, but then they would not turn. "Doh!"
Now as I wanted the wheels to spin so to speak, the shaft, both seen here as grey tubes are the same diameter as the hole in the disc brakes.
My now wooden dowels are not... Having a bit of a think (which required a lay down afterwards!') I came up with this solution.
Taking a strip of paper the same length as the wooden dowel, I wrapped the strip tightly until it became the same diameter as the inner diameter of the grey tubes.
The two small discs will become apparent later.

With the strip pushed inside the grey tube, the wooden axle can now sit nicely inside and rotate.


As the wooden axle is just shy of 0.5mm longer than the grey tube, the circular disc (left over from un-used parts on the sheet) can be placed on the end to allow the wheel to turn.
*NOTE THE DISC IS TO BE ATTACHED LATER.

Removing the steering arm allows me to turn the hubs so the rear of the axle is accessible to put the disc onto the wooden dowel.

Both small discs attached to wooden dowels allowing for freewheeling... erm, well wheels!
If you don't want the wheels to turn, ignore all this mumbo-jumbo and just glue your wheels to the hub, easy-peasy!

THAT'S ALL FOR NOW, TUNE IN THURSDAY FOR THE BIG, well the small reveal

Eerything looks so very clean, clear, and crisp! This is turning to be a very nice and informative thread. I like both what I see and read.
- Apr 5, 2013
- 14,017
- 10,496
- 228
Dude, build up the tail lights, that flat panels would be so easy to do. A piece of Red plastic for the lens, and an O-Ring for the rubber rim (they do sell square profile rubber O-rings), but if you look at the actual picture, the tail lights have rounded edges on them. Totally worth it, and will make the tail end of the car pop. 
